Worst Posted November 19, 2023 Posted November 19, 2023 Among the supplies I bought was one of those mini-sewing machines for the simple tasks that I could do by hand but would take too long and wouldn't look pretty. Even though these little things would be hidden under other parts of the costume I wanted to a pretty job this time. Practice first on an old shirt. The provided instructions weren't very helpful. Found a helpful video someone made and felt comfortable enough to try it for real. Since it came with white thread pre-installed, I decide to tackle making a bridge for the belt. I think it worked fine for this. For the next job I needed to remove the white thread and replace it with black. Somewhere during this process, I guess I touched the tension knob. Apparently from some of the reviews the tension for machine is impossible to reset. All the work I did with the black thread looks worse than if I did it by hand. Maybe this is my fault for not buying a real full-size machine, but I don't intend to ever do more than simple things when it comes to sewing. You don't by professional grade frying pan if the only thing you're going to make are grilled cheese sandwiches. Hours I spent trying to troubleshoot it I could actually finish a few things if I had done them by hand. How do I know it is the machine and not just my lack of skill? The next day after getting the machine I got Amazon message from the maker saying in order to have a better experience please follow these instructions. To me that's pretty much admitting your product doesn't work as advertised. Time to see about returning it.I have a cheapy from Amazon that my wife got me for my birthday one year. Here was my experience and I'll state, your mileage may vary (though it sounds like your experience has been the same). I'll also preface that I'm still very much learning.Using the sewing machine was a nice simple introduction to how to operate a sewing machine. It has one stitch type and the thread that came with it was garbage. I could not for the life of me understand how to get the tension dialed in. But got it to work ok for some test pieces.I quickly found someone who was willing to lend me their much more expensive (comparatively) machine. The difference was night and day. What took me an hour on the cheap machine took me minutes on the more expensive one. I still have no idea what I'm doing with the tensioner but it is wayyyy more forgiving.My takeaway follows a similar experience I had skateboarding. If you buy the cheapest equipment, you won't just be learning a new skill, you'll also be learning around the shortcomings of the equipment. In the case of skateboarding a cheap board isn't just more difficult, it's more dangerous. But, at the same time, there's a point where no matter how much you spend. You still need to learn the skill.Ultimately it's your call. It sounds like hand sewing might be worth it for just a few items. For me I'll probably buy a much nicer machine if my friend doesn't want to continue to lend me theirs. Im also planning on doing most of my soft parts so the investment is a no brainer Quote
Aradun Posted November 19, 2023 Posted November 19, 2023 There is a bit of a learning curve, but most of us who have ventured into this hobby have started where you are at, with little to no experience. Honestly, if you have the funds, invest in a decent machine. Trust me, this may be your first costume, but it likely won’t be your last . This hobby is a bug that has no cure, says the guy whose on his 4th costume in three years . A good machine is a worthwhile investment. Joann.com has some really good models with Black Friday deals where you can snag a good machine for $100-$150 on sale. If you’re not sure what to get, just ask. You’ll receive plenty of suggestions to help you take the guesswork out of making a purchase. Quote
Fox Posted November 19, 2023 Author Posted November 19, 2023 Last night I did my best to hand sew over the many missed gaps from the machine. This morning I did the other side entirely by hand. Took less time and looks better. Not perfect by a long shot but it is black on black and hidden under the white belt. Did a test fitting and the thermal detonator does conceal the bridge I made for the white belt. I've decided not to sew the cod piece on to the vest. As I'm fairly tall and I'm bound to rip all the stitches out if I move the wrong way or even tear the vest itself. This also reduced the cod piece from bunching up. I'll just have to sew in some Velcro on the jumpsuit not only to help keep things in place but to act as marker of how high or how low things should go. Quote
Retrofire Posted November 28, 2023 Posted November 28, 2023 Both @Aradun and @M.J are amazingly talented folks with a sewing machine. Please feel free to post up some photos so they can give you some guidance. In the mean time please know that most of us have walked where you are now and the great folks from this detachment always stepped up and helped so fret not! 1 Quote
Aradun Posted November 28, 2023 Posted November 28, 2023 I've decided not to sew the cod piece on to the vest. As I'm fairly tall and I'm bound to rip all the stitches out if I move the wrong way or even tear the vest itself. This also reduced the cod piece from bunching up. I'll just have to sew in some Velcro on the jumpsuit not only to help keep things in place but to act as marker of how high or how low things should go.If your unsure where to set the cod for attachment to the jumpsuit post up a pic and the armory team can help dial it in for you. The important thing to keep in mind is that the cod should lay flat against the crotch. If it’s too low it will get pulled in between your legs. Likewise, if the strap is too short you’ll also end up pulling the cod between your legs and the result of both is the dreaded cod crunchies. 1 Quote
M.J Posted November 30, 2023 Posted November 30, 2023 HI ya Fox, I do tend to resort to hand sewing myself. Though food for thought, I held off buying a Heat gun, never needed and thought it was only going to be for my scout build so I did most of it with hot water and hair dryer. I did buy that heat gun and thought "Dam I should've gotten ages ago" it has come in handy in so many cases. Its pretty much like the sewing machine, you may need one for this costume, though down the track you may want to fix or make something else, hem pants or curtains etc and the Sewing machine will pay for itself. A low level machine with no bells or whistles will do you just fine, and if you do move the dial its easy to fix, I tend to take a photo or take note on were everything sits that I have found comfortable. You tube is great to show how to use them, I finally got a heavy duty machine and that bobbin is side on, I'm still watching a video everytime I need to rethread that sucker. Just putting it out there, I attach my cod elastic up the back in the cummberbun, though its also at the front in the cummberbun as well. Quote
Fox Posted November 30, 2023 Author Posted November 30, 2023 I'm currently putting out feelers for a tailor. I play an ever so small part with the local creative community. I have two of these cummerbunds to play with but I'm seeking out a skilled help before I attempt things. 2 Quote
Fox Posted December 2, 2023 Author Posted December 2, 2023 Found somebody willing to do it no charge. I gave them a hefty tip. Took about an hour. Won't earn level 2 but will qualify for level 1. Going to work on a few fine adjustments. Mainly figure out where I want things to rest and sew on little patches of Velcro on the jumpsuit to anchor things. 1 Quote
Harbinger Posted December 4, 2023 Posted December 4, 2023 I paid a tailor to do all my goods, TBH I now regret having the opportunity to learn to sew as I’m already needing repairs and have to learn anyway. Such is life! Quote
Retrofire Posted December 7, 2023 Posted December 7, 2023 You did just fine. There's always an opportunity to learn a new skill if you desire to and we have plenty of folks that are always willing to help. We're here to help you be successful so keep up the great work and reach out should you need us. Quote
Fox Posted December 9, 2023 Author Posted December 9, 2023 Small update did another full suit test fitting in the mirror and felt everything looked good enough for some submission pictures. Stepped over some large boxes to reach my camera, bent over to pick up my blaster, dragged a chair out of the way and do see where I'm going with this? Everything that was "in-place" got knocked off center from all the moving around that I did. Set your shooting spot up first before getting suited up. I do think one of drop pouches might be too low or I might lean to the side when standing. Funny thing is looking at what has been approve by my garrison these last couple of years mine looks alright even with these sloppy pictures. I think I do want to see about adjusting that one pouch first. Quote
Chopper Posted December 9, 2023 Posted December 9, 2023 Feel free to share any submission photos if you'd like. We're happy to offer feedback. Quote
Aradun Posted December 10, 2023 Posted December 10, 2023 A picture’s worth a thousand words . Here’s a couple of posts with details on uploading pics to your posts:http://forum.501stpathfinders.com/index.php?/topic/22990-sharing-photos-with-dropbox/#comment-215704http://forum.501stpathfinders.com/index.php?/topic/23053-faq-how-do-i-post-images/You can also download the free Tapatalk app which will allow you to upload pics right from you phone. Not sure if this was shared with you earlier, but here’s a link that will give you tips and tricks on keeping everything in place. It’s worth a look if you have not seen it yet.http://forum.501stpathfinders.com/index.php?/topic/w18894-some-tips-for-keeping-your-scout-costume-together-while-trooping/Let us know if you have any questions. Quote
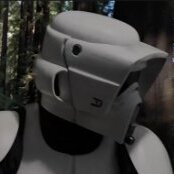
Fox Posted December 16, 2023 Author Posted December 16, 2023 I've been busy with this and other stuff. Felt I was very close and submitted what I had. Took a couple extra pics as requested and well as you can see by my Avatar and the picture below, I'm ready for patrol. https://drive.google.com/file/d/1GgYh2DvXs9oAinSYxjKJZLBfrEO070l8/view Even though it's approved I still consider this a work in progress. Like with my TK once I start using it more I'll upgrade and tweak things. Yesterday I bought some knee pads to wear to protect my knees from the Scout's plastic ones. Can't wait to try it out in public. Quote
Harbinger Posted December 16, 2023 Posted December 16, 2023 You’re never done. Just redid my knee return edges after a 2-mile walk in armor a couple weeks ago. 2 Quote
Hask Posted December 16, 2023 Posted December 16, 2023 1 hour ago, Harbinger said: You’re never done. Just redid my knee return edges after a 2-mile walk in armor a couple weeks ago. True words these are. 1 Quote

Recommended Posts
Join the conversation
You can post now and register later. If you have an account, sign in now to post with your account.