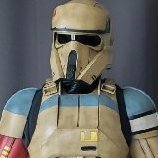
Kilika Posted July 30, 2022 Posted July 30, 2022 Good day everyone. I have some free time coming up and decided to try to put together a "rough" assembly guide for those thinking of using Sean's Files for their Shore. In this post I will be doing a quick review for the Version 2 Chest and the Lower back/Kidney Assembly. The files can be found at https://www.shoretrooper.co.uk/ Chest First be sure you are in the correct folder as there are two chest folders. The folder labeled "Shoretrooper Chest" is the Version 1 model. You want the Version 2 as it is "more" screen accurate. Thus the files you want are in "Version 2 Shoretrooper Chest" which should be the last folder in the series. The chest can be printed as a single piece or in 11 separate parts to form the whole. Think of it as three sets of three being left, center, and right. Each side (left and right) also has a "side front" which connects to the chest to the back armor (not discussed in this guide). In Sean's folder files 1-3 are for the center (both the center middle and bottom are labeled as 1 even though the middle should technically be 2), 4,6,8 are for the left side, 5,7,9 the right, and 10-12 are the side connectors. Please note that for the left and right sides certain files have "duplicates". By example there are two file 4s, one with supports and one without. You only need to print one of these so you can chose if you want it with or without supports. For the side connectors 10 and 11 are the individual sides. If you use 12, you will print both of them at the same time thus, do either 10 AND 11 OR just 12. Center Pictured here are files 1-3 being the center bottom, middle and top. As pictured the bottom is to the left while the top is on the right of the picture. You will see that the center piece has angled sections at its ends. The bottom and top will align with those making the center completed into a single piece (you'll need to secure via glue or other method). The top and bottom pieces will be angled when secured to the center piece. This is important as the angle will help with alignment to the left and right sides as discussed further in the guide. The left and right are basically mirror images of each other so I will only be showing the left side as the right will be the same, just flipped. From picture left to right we have 8 (top left), 6 (center left), and 4 (bottom left). The files are labeled slightly confusing as they are left middle top (top), left middle bottom (middle), and left bottom (bottom). They actually fit together nicely which helps figuring out the connections. In this picture I rotated the left top backwards to show that there is a grooved slot in the base. Their is a ridge present on the middle that slides in nicely. Insert the middle edge into the grooved slot and push it gently in until it hits the edge. The top and middle should look relatively flush with each other. With the top and center attached, the bottom aligns with the center (the center being offset slightly so a lip from the bottom will overlap it). This creates almost a "shelf" for the center to sit on the bottom piece. Connecting the left/right sides to the center chest relies on the edges present on the respective left/right pieces. A front view shows the center center piece with the lower half of the left's top most piece. You will see the lip from the left piece will align with the back of the center. The upper lip on the left side goes along the back of the center's top most piece. In this next picture we have the bottom pieces for both the left and center. The tab on the left side piece will be flush with the back of the center piece. The bottoms of both pieces are slightly rounded and what you are looking to ensure are aligned/flush with each other. When all pieces are connected together, the bottom left and right pieces will extend slightly beyond the top of the center bottom piece. That is ok because this evens out when all bottoms/center pieces are connected together. The side connectors also have tabs that align with their respective sides. Here we have the bottom left piece (left side) with the left side connector (right of picture). The tab of the side connectors will back the bottom/middle pieces of their respective sides. Old pictures from my build to show a front and back view of the Version 2 chest. I did not yet have the side front connectors present so please note they are missing from the picture. Kidneys and Lower Back These files are found in two different folders. The primary folder is "Shoretrooper Kidney" but you'll also find parts needed in the "Shoretrooper Belt". The Kidney folder has a full construct file but also can be broken down into 8 separate pieces (six files from Kidney, two from Belt). In "Kidney" files 1,2, and 6 are for the right side with their "mirrors" being 3,4, and 5 for the left. Each side has a belt piece labeled as "back-right" or "back-left" in the "Belt" folder. Pictured here is the full construct. Shorie is pointing, with his E22, to the belt backer section not present in the Kidney folder. Moving on to the pieces themselves we will be look specifically at the right side. We have Right A, Right B, and Backplate Right to make a full "set". Pictured next is Right A and Right B. Notice that there is a angular ridge that shows where the two should be connected. The pieces will be next to each other with Shorie pointing to the "tip" being the top of the angled ridge (in the picture the left piece needs to be elevated for the pieces to "lay right" and connect properly). The back plates connect via a lip from the side panel that overlaps with the interior of the back plate. Again Shorie is pointing at the lip (the lip goes inside the back plate). This shows the "back-right" (remember Belt folder) with the Right A. Right B would go "on top" of the belt backer. The Back plates have a tab that overlaps the two. In the below picture (Right plate is picture left, Left Plate is picture right) you can see the tab on the right plate goes on the interior of the left with them meeting flush. Printed example of the pieces follows: Please note that the second picture has pieces from the central abdomen included as well (everything to the right of the angled taped area is from the abdomen). I hope this is helpful for those working on trying to figure out how the files come together. I will be working on getting a guide up for the abdomen and greeves next. Thank you all for your time. Cheers Chris 1 2 Quote

Recommended Posts
Join the conversation
You can post now and register later. If you have an account, sign in now to post with your account.