TKZombie Posted June 8, 2021 Author Posted June 8, 2021 Progress continues slower than I'd like but it's going. I tried to work with the IS shins but trying to build them to be screen accurate just isn't working. To get the straps to position correctly mean s the front plate has to be pushed really far down. Then it impacts your walking. I've given up on the shins and have decided to print MPSB shins instead. Forearms are completed and in the process of adding bond to the resin piece so they are seamlessly attached. The biceps and shoulders are strapped and ready to prime. I'm keeping the bicep back open. The abdomen is fully assembled, I added 1" shins on each side to help fit better. I've also added buckles and straps as suspends for this section as well. Finishing up bond on here as well. The torso, chest and back are completed now. The back collar was a pain to attach, I had to contact Kevin and he noted the neck on the back plate has to be trimmed wider than the edge to get the collar to fit. I reinforced it underneath as well. I'm using MPSB straps and buckles and shoulder bridge plate as well. I'm using the MPSB belt plate cover and the spine plate. I've also printed the thermal detonator and vertical canister and caps from those files, much lighter than the resin ones and more accurate. Riveted on the snaps to attached the belt to the plate and the plate to the fauld. Highly recommend using a drill press for these as trying to drill was difficult to get them precisely lined up. Hand plates are also printed from MPSB files. I have the E22 Blaster printed and assembled just need to weather and detail it. I'm not a fan of printed bolsters because of their weight so I've added a rod of rebar inside the middle tube so the blaster has some weight to it. Finishing bondo work is underway and then priming that before moving onto a overall sanding of all the abs before taking it to the brown primer stage. Shins are slowly printing, probably a couple weeks before their ready to assemble. But hopefully I'll have everything else primed and start to prep for weathering masking before moving to colour painting. 3 Quote
KOtrooper Posted June 9, 2021 Posted June 9, 2021 Is the rebar a temporary addition? You might change your mind after holding the e22 for a few hours on a troop.Sent from my Pixel 3a using Tapatalk Quote
TKZombie Posted June 9, 2021 Author Posted June 9, 2021 7 hours ago, KOtrooper said: Is the rebar a temporary addition? You might change your mind after holding the e22 for a few hours on a troop. Sent from my Pixel 3a using Tapatalk It’ll be permanently fixed. I’m use to a hyper firm DLT19 which is just as heavy as this or a full resin E-11. Quote
TKZombie Posted August 5, 2021 Author Posted August 5, 2021 I've been horrible at updating this build, mostly because of needing to load pictures to Imgur to host them first. Progress continues...Everything from the waist up is finished and been painted. Here is everything prior to removing the masking for chips in the Sarah Beige. A test fitting, lots of small fit tweaks to do but getting there. I have decided to go with MPSB shins over the Imperial Surplus ones as trying to build them to be screen accurate is impossible. I printed the shins in PLA scaled up 110% in X and 115% in Y & Z to fit my height and build. While sanding the one side it snapped clean in half. I know why I hate 3d prints. I glued it back to together and reinforced the seam on the back with a strip of ABS. After they were sanded with 150, 220 and 320 grits I had a signifiant amount of flaws in the print lines to fill. I used a mixture of Bondo (Glazing spot putty mixed with acetone to thin it down to a consistency of acrylic paint and brushed on a layer to smooth everything out. That dries over night then will be sanded smooth. I didn't take a picture of it sanded down. Once it was done I found juice cartons (filled with water for support) were the perfect shape to fit inside and hold my shins for painting. Off to the home made spray paint booth in my garage, a lazy suzy attached to a board for a turntable, lights, cardboard side and top to contain the overspray and a fan to blow the spray outside. A cheap filter goes over the fan motor. Here is the first layer of filler primer. I'll sand those and touch up any flaws with more bondo and add a second filler primer layer then move onto the brown paint. The shin covers and knee parts are printing in resin so they'll be super clean and only need a light sanding and then directly to painting brown. The right bicep was a nightmare to paint. The Toyota Red goes on horribly, its very thin so needs 2-3 layers to get coverage and then it doesn't dry even, some parts are pinkish matte and others a glossy red. I wet sanded it down and tried again with 2 more coats and the exact same issue happened. Thankfully Facebook Shoretrooper Fam group to the rescue. I applied a couple layers of Montana Gold Acrylic Matte Varnish and that evens out the colour. The boots are underway, raw umber, burnt umber, and black oil paints to darken, then onto drybrushing some sandy/beige acrylic paints once the oils dry up. Here is the first with oils applied. I'll be moving onto weathering and distressing the armour and pants this weekend while the shins finish up printing and priming. Montana Gold Acrylic Spray 11oz Varnish Matte 2 Quote
KOtrooper Posted August 6, 2021 Posted August 6, 2021 Looking great. Bummer about the Toyota Red. The can I got went down very nice. Sent from my Pixel 3a using Tapatalk Quote
TKZombie Posted August 6, 2021 Author Posted August 6, 2021 9 hours ago, KOtrooper said: Looking great. Bummer about the Toyota Red. The can I got went down very nice. Sent from my Pixel 3a using Tapatalk It seems very hit and miss. Ive talked to others with the same issue. One who did two biceps and one was fine the other this same issue. I tried a 2nd can and same issue. I bought them almost a year apart but the manufacturer number is the same lot, was from the same store so I guess it’s not overly popular. Anyway at least there was a solution. 1 Quote
Minimo Posted August 9, 2021 Posted August 9, 2021 Looking great!Sent from my iPhone using Tapatalk Quote
Aradun Posted August 9, 2021 Posted August 9, 2021 Always love the level of detail you provide Christina. Looks fantastic. Quote
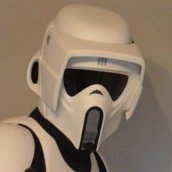
TKZombie Posted December 1, 2021 Author Posted December 1, 2021 Sorry, I've been too busy to update here, so here is a bulk update... Trial fitting of the painted armour (pre-weathering) from the waist up. Onto the weathering, the fun part! All masking (liquid latex) was applied on the base brown paint then painted with the final colours. Masking was them removed and some additional wear added with sandpaper, files, and a Dremel. Here's an example of artists oil paint weathering. Raw Umber is applied all over with a cheap chip brush. (PRO-TIP: The Montana gold paint can sometimes go on with a bit of a dusty finish, or semi rough texture once its dried, usually from spraying too far from the surface. In thiose cases I wet sanded the dried paint with 1000 grit to get rid of that texture, if you don't the oil paint weathering method will not work as it will collect in the rough texture. I learned that from experience) Then the bulk of the oil paint is wiped off with paper towel (Wear latex gloves though this whole process) Leaving more wear dirt naturally collects which is in creases and also make note of gravity dirt/grime collects along bottom edges not on the top. You have a long working time with oil paint to perfect it. Then I drybrush/stipple in weathering to build up some layers. From there I let is dry for 2-3 days and add some additional layers of Brunt Umber and Black oil paints to create further depth and variety. Different colours need somewhat different applications. The red being a different type of paint took the oil paint differently. Before and After, you can see I'm always referencing screen photos as a work, from building the armour to weathering. The shins, the nemesis of this costume, The Imperial Surplus ABS shins simply don't cut it, they are by far the weakest link in that kit. I'd personally would have preferred ABS but their inaccuracies were just too far off for me. So I bought MPSB files and printed the shins, the shins are PLA and the cover parts and knee plates are all resin printed. I did have photos assembling them and painting these but seem to have deleted them. But here are the finished shins pre weathering. Weathering, I found juice cartons worked perfectly for supporting the shins, filled with water they created a stable base to work on for painting and weathering. (sorry for the lighting, I have amber tinted lights in my dining room so they aren't great to photograph at night.) Once they were done they had to dry which is about a 2 week process. I'll suit up with everything for the first time once they are done but till then here is everything. The pants and shirt were both weathered with oil paints as well, just very light layers of dry brushing building layers gradually. And flash forward 2 weeks... Here is the finished Shoretrooper Grunt. Son of a !!!!! I just saw the back of the armour skirt had popped out and was hanging below the belt. Suiting up alone and taking photos is hard!!! Oh well... I'm very happy how this all turned out but it was by far the hardest build I've done and nearly broke me a few times. There's no quick assembly here, to do things right takes time, a lot of time! It's a lot to assemble then there is multiple layers of paint, chipping, distressing, and weathering to deal with. I'd say if this is your first costume build it's not going to be easy. This is my 15th costume so I have a lot of experience and I struggled. Its not very comfortable and I was surprised how limited mobility is in it. And now the fun photos with the submission ones out of the way. 7 Quote
Minimo Posted December 1, 2021 Posted December 1, 2021 Absolutely fantastic work! Congrats!!!!!Sent from my iPhone using Tapatalk 1 Quote
KOtrooper Posted December 1, 2021 Posted December 1, 2021 Amazing build. The weathering is on point!!Sent from my Pixel 5a using Tapatalk 1 Quote
Aradun Posted December 1, 2021 Posted December 1, 2021 Christina your armor builds are pure artistry! You’ve got mad skills when it comes to weathering. Amazing. Simply amazing. 1 Quote
TKZombie Posted December 1, 2021 Author Posted December 1, 2021 3 hours ago, AradunFF said: Christina your armor builds are pure artistry! You’ve got mad skills when it comes to weathering. Amazing. Simply amazing. Awwww thank you that’s really kind of you to say! Quote
Chopper Posted December 1, 2021 Posted December 1, 2021 Nice work. I can't imagine that you will any issues whatsoever with approval. Having struggled with some of the issues of the Imperial Surplus Armor myself, I was also intending to print the shin plates from Mr. Paul's files as well. Well, at some point...hah. Again, great work! Your attention to detail is outstanding as always. Quote
TKZombie Posted December 1, 2021 Author Posted December 1, 2021 3 hours ago, Chopper said: Having struggled with some of the issues of the Imperial Surplus Armor myself, I was also intending to print the shin plates from Mr. Paul's files as well. Well, at some point...hah. Yeah those shins are really the big weak spot in that kit. It wouldn't be that much to update for my accurate if he wanted to. I tried multiple times to make them work but its impossible to get the straps to line up at the back and front to be screen accurate. Quote
BikerScout007 Posted December 1, 2021 Posted December 1, 2021 Nice work! Hope to see your Vanguard application soon Quote
TKZombie Posted December 1, 2021 Author Posted December 1, 2021 3 hours ago, BikerScout007 said: Nice work! Hope to see your Vanguard application soon Thank you, that was the plan and I’d love to submit for Vanguard but my E22 doesn’t meet the standards. So unfortunately I won’t be submitting. Doubtful I’ll replace the E22 I have to meet the standards. Quote
BikerScout007 Posted December 1, 2021 Posted December 1, 2021 30 minutes ago, TKZombie said: Thank you, that was the plan and I’d love to submit for Vanguard but my E22 doesn’t meet the standards. So unfortunately I won’t be submitting. Doubtful I’ll replace the E22 I have to meet the standards. Stunt E-22s are allowed for Vanguard. My own E-22 is in that style. I don't have all the LED lights either. The only issue I saw at quick glance was the painted red stripe, which would just need to be removed, and the lack of M plates. If you did the Sean Fields, I have the files for those. Quote
TKZombie Posted December 1, 2021 Author Posted December 1, 2021 Just now, BikerScout007 said: Stunt E-22s are allowed for Vanguard. My own E-22 is in that style. I don't have all the LED lights either. The only issue I saw at quick glance was the painted red stripe, which would just need to be removed, and the lack of M plates. If you did the Sean Fields, I have the files for those. The red stripe is a plastic reflective film, Did the stunts not have anything there? That could be removed. The screws are all Robertson head and need to be replaced with hex head ones. The M plates I'm not sure of what you mean, I don't know what part that is. I think it's the plates on either side one under the flashlight part and the other on the opposite side, if that is mine doesn't match the reference photos, it has 3 extra blocks on the left side. The scope I know is wrong and I have replacement that is the correct scope and I'm currently painting it. I didn't print it, it was printed by and friend and he assembled and based painted it black it when he did it, so unfortunately there is too many print lines visible, which I guess won't be approvable. Trying to sand out those on an assembled piece is not something I want to attempt. I can post photos to see what you think but I don't think its close enough from the reference I reviewed. 1 Quote
BikerScout007 Posted December 1, 2021 Posted December 1, 2021 Sounds good. Maybe @Minimo and @KOtroopercan offer up some pointers as well. And yeah I hate sanding and didn't want to do it either. I ended up coating my blaster with XTC-3D to remove the lines. Quote
KOtrooper Posted December 1, 2021 Posted December 1, 2021 Filler primer also works wonders to fill in the print lines. You could also just buy/print/build an E-11B blaster and leave your E-22 as-is. Quote
Tarok Posted December 2, 2021 Posted December 2, 2021 Magnificent work! Did you need to seal the oils at all once you’d got the desired effect?Sent from my iPhone using Tapatalk Quote

Recommended Posts
Join the conversation
You can post now and register later. If you have an account, sign in now to post with your account.