Aradun Posted May 11, 2020 Posted May 11, 2020 Awesome Mark. Looking forward to hearing of your approval, then on to Lancer! Sent from my iPhone using Tapatalk 1 Quote
Temple55 Posted May 12, 2020 Posted May 12, 2020 On 11/20/2019 at 2:13 PM, BikerScout007 said: I didn't use heat on the lens. The Hobart lens is pretty flexible and the hot glue holds it well. I, for the life of me, cannot get the lens in place. The only thing I have to heat it with is a hair dryer, which doesn't appear to be hot enough. And if I just try to place it without molding the shape first, it just pops right back out before any glue can cure. Do you happen to have any tips? I've already ruined one lens trying to glue it on. I only have enough face shield left for two more attempts. Quote
BikerScout007 Posted May 12, 2020 Posted May 12, 2020 16 minutes ago, Temple55 said: I, for the life of me, cannot get the lens in place. The only thing I have to heat it with is a hair dryer, which doesn't appear to be hot enough. And if I just try to place it without molding the shape first, it just pops right back out before any glue can cure. Do you happen to have any tips? I've already ruined one lens trying to glue it on. I only have enough face shield left for two more attempts. After I cut out the shape of the lens in the Hobart lens, I got the hot glue REALLY hot. Which means you gotta let the gun heat up for awhile before you start using it. Use a lot of glue, don't be frugal with it. You might make a little bit of a mess with the hot glue -- you'll just have to clean it up once the lens is in place. I only used glue on the sides of the lens, not the top and bottom. Once you push the lens into place, you need to hold it in the glue for a few minutes. I'd say at least 5-10 minutes until the glue has dried and cooled. How did you ruin your other lens? If it's got hot glue on it, you should be able to scrape it right off. You could try warming the lens up with the hair dryer right before you press it into the glue just to loosen it up a little bit, but I didn't have to do it. And the hobart lens is so thin, too much heat would warp it quick (I've definitely done THAT before). Quote
Temple55 Posted May 12, 2020 Posted May 12, 2020 7 minutes ago, BikerScout007 said: After I cut out the shape of the lens in the Hobart lens, I got the hot glue REALLY hot. Which means you gotta let the gun heat up for awhile before you start using it. Use a lot of glue, don't be frugal with it. You might make a little bit of a mess with the hot glue -- you'll just have to clean it up once the lens is in place. I only used glue on the sides of the lens, not the top and bottom. Once you push the lens into place, you need to hold it in the glue for a few minutes. I'd say at least 5-10 minutes until the glue has dried and cooled. How did you ruin your other lens? If it's got hot glue on it, you should be able to scrape it right off. You could try warming the lens up with the hair dryer right before you press it into the glue just to loosen it up a little bit, but I didn't have to do it. And the hobart lens is so thin, too much heat would warp it quick (I've definitely done THAT before). Well, I tried superglue first, and it just smeared all over the place. Won't be trying that method again. I hesitate with hot glue, because the Florida heat and humidity has not been kind to troopers using super glue in the past. I still have E6000, which I saw being used in a tutorial video. So I may try this. But that takes a long time to cure as well. Thank you for the input. Quote
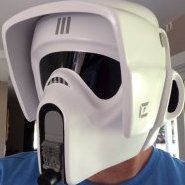
mickeymark34 Posted May 12, 2020 Author Posted May 12, 2020 49 minutes ago, Temple55 said: I, for the life of me, cannot get the lens in place. The only thing I have to heat it with is a hair dryer, which doesn't appear to be hot enough. And if I just try to place it without molding the shape first, it just pops right back out before any glue can cure. Do you happen to have any tips? I've already ruined one lens trying to glue it on. I only have enough face shield left for two more attempts. Is it a Studio Creations helmet? He should have given you a clip that you glue on the bridge of the inside of the snout. It should hold it in place well enough to apply whatever it is that you are going to use hold it in place. Heres an early photo of the lens as I was installing it. Also, the way the clip is made, the lens perfectly contours with the opening so you shouldn't need much to hold it down. 1 Quote
BikerScout007 Posted May 12, 2020 Posted May 12, 2020 11 minutes ago, Temple55 said: I hesitate with hot glue, because the Florida heat and humidity has not been kind to troopers using super glue in the past. I still have E6000, which I saw being used in a tutorial video. So I may try this. But that takes a long time to cure as well. Thank you for the input. Sure understood. I had to reapply hot glue to my RS because I left my bucket in a car when it was 115 degrees outside. But it's held ever since. I've also done it to my KS bucket and my Sean Fields Shoretrooper bucket. So far so good, but I haven't taken them out to the desert. But I have trooped in typical Southern California heat without problems. Quote
Temple55 Posted May 12, 2020 Posted May 12, 2020 8 minutes ago, mickeymark34 said: Is it a Studio Creations helmet? He should have given you a clip that you glue on the bridge of the inside of the snout. It should hold it in place well enough to apply whatever it is that you are going to use hold it in place. Heres an early photo of the lens as I was installing it. Yes it is and yes I have that! I didn't know what that was supposed to be used for. That will probably help for sure. Thanks! 2 minutes ago, BikerScout007 said: Sure understood. I had to reapply hot glue to my RS because I left my bucket in a car when it was 115 degrees outside. But it's held ever since. I've also done it to my KS bucket and my Sean Fields Shoretrooper bucket. So far so good, but I haven't taken them out to the desert. But I have trooped in typical Southern California heat without problems. Thanks. I may just try that method then, if it's been able to hold up there. Quote
mickeymark34 Posted May 12, 2020 Author Posted May 12, 2020 Just now, Temple55 said: Yes it is and yes I have that! I didn't know what that was supposed to be used for. That will probably help for sure. Thanks! Thanks. I may just try that method then, if it's been able to hold up there. If you don't have instructions for the helmet, email Jeff and he'll send you some. That's what I had to do. Quote
Temple55 Posted May 12, 2020 Posted May 12, 2020 1 minute ago, mickeymark34 said: If you don't have instructions for the helmet, email Jeff and he'll send you some. That's what I had to do. Oh okay. Did not know about that either. Yeah, it didn't come with the instructions. I've been using a KS build tutorial, as it's the closest thing I've been able to find. Quote
mickeymark34 Posted May 12, 2020 Author Posted May 12, 2020 22 minutes ago, Temple55 said: Oh okay. Did not know about that either. Yeah, it didn't come with the instructions. I've been using a KS build tutorial, as it's the closest thing I've been able to find. Also, you shouldn't have to use heat on the lens once this clip is in place. It is like a little piece of magic. Make sure the longer end of the clip is facing towards you inside the helmet. It is kind of hard to see in that picture. Quote
Temple55 Posted May 13, 2020 Posted May 13, 2020 19 hours ago, mickeymark34 said: Also, you shouldn't have to use heat on the lens once this clip is in place. It is like a little piece of magic. Make sure the longer end of the clip is facing towards you inside the helmet. It is kind of hard to see in that picture. Thanks. I glued it on last night, using the clip, and it hasn't popped of yet, so I think it's all good now. 1 Quote

Recommended Posts
Join the conversation
You can post now and register later. If you have an account, sign in now to post with your account.