kroenen77 Posted December 30, 2017 Posted December 30, 2017 So here is my Scout helmet from RS so far... Next step is to drill the holes for the screws...must I use the markings from RS that are in the mold? They are not in the middle...or must I drill exact in the middle of the round area? 1 Quote
762s Posted December 31, 2017 Posted December 31, 2017 looks good! about the holes ... they are fubar factory marks, and what matters is the hole in the helmet as the visor will be a square hole. i measure and center the square part of the bolt in the round area on the visor .. with the square cut out, re-tape the visor to the helmet and find center through the square on the helmet to make a hole there. good luck and keep us posted! 2 Quote
kroenen77 Posted January 1, 2018 Author Posted January 1, 2018 Thanks,man.But what means "fubar factory"?There is no translation in german. Quote
762s Posted January 1, 2018 Posted January 1, 2018 Thanks,man.But what means "fubar factory"?There is no translation in german. fubar is like saying something is messed up, not right, incorrect, bad ect. it is a military acronym for (f**ked - fouled) up beyond (all - any) (recognition - repair - reason) so, the factory bolt holes are fouled up beyond reason or simply put they are incorrect Quote
kroenen77 Posted January 1, 2018 Author Posted January 1, 2018 Ah,thanks for the info.Now I understand it. 1 Quote
spyder918 Posted January 2, 2018 Posted January 2, 2018 How did you get the helmet? Did you get it all in pieces? Quote
kroenen77 Posted January 3, 2018 Author Posted January 3, 2018 How did you get the helmet? Did you get it all in pieces? Yes..it comes all in pieces.Here is a pic of my kit out of the box: Quote
kroenen77 Posted January 3, 2018 Author Posted January 3, 2018 Has anybody an idead what this "screws" are? Quote
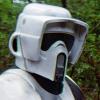
kroenen77 Posted January 8, 2018 Author Posted January 8, 2018 So my helmet is ready for painting now. What colors are correct?White glossy or semigloss? The black for the snout matt or glossy? And how did you fixed the dark visor in the facemask?Found no pic of this area online. Quote
762s Posted January 8, 2018 Posted January 8, 2018 the bolt in the picture looks to be the back of an elevator bolt .. maybe, its was a temporary thing ? most use a glossy white paint for the snout ive seen about 50/50 using glossy and matte for the visor .. well, you may want to look at throwing the rs visor in the trash and sourcing a new visor the rs visor is way to dark heres the ones i use now .. http://www.freestylextreme.com/us/home/brands/oneal-mx/oneal-grey-b2-rl-mx-goggle-lens.aspx?prodid=231576&q=oneal+lens&refine=q%7boneal%5cu0020lens%7d it is dark enough, scratch resistant and anti fog check my post here for a pic of it from the inside http://forum.bikerscout.net/index.php?showtopic=18321&view=findpost&p=168026 to secure the lens just use some hot glue ... makes for easy replacement when needed Quote
kroenen77 Posted January 9, 2018 Author Posted January 9, 2018 Thanks for the fast answer. I will do what you said. 1 Quote
kroenen77 Posted January 21, 2018 Author Posted January 21, 2018 Ok...cut out the 8th vent also...: And molded a new vent area: 3 Quote
kroenen77 Posted February 12, 2018 Author Posted February 12, 2018 I´m looking for the right grey color for the snout and the visorscrewcaps...is both the same?In the movie the snout looks darker as the screwcaps?When I wanna match the RS-Stickers,the visorcaps are looking too dark. Quote
Chopper Posted February 12, 2018 Posted February 12, 2018 I´m looking for the right grey color for the snout and the visorscrewcaps...is both the same?In the movie the snout looks darker as the screwcaps?When I wanna match the RS-Stickers,the visorcaps are looking too dark. If you look at this photo from the original armor below, you can see that the bolt and snout are close, even if they're not exactly the same color. Based on the photo, the nose does look slightly darker than the bolts. When I painted my rig, I used Testors Model Master Navy Aggressor Gray. I'm not sure what the distribution of Testors is in the EU though? Are you able to get it in Germany? https://www.amazon.c...p/dp/B004QPIA8O Quote
kroenen77 Posted February 12, 2018 Author Posted February 12, 2018 Thanks for the pic and tip. Sadly I cannot buy this color here in the EU.But I have lots of airbrush grey tones in my workshop,so I think one color should be very close.So I think that I must paint the snout also more bright...but after that it will no longer match the dark grey on the RS stickers. Oh and whats with this sticker?All other stickers I must put in water before,right?But this one also?I can very easy release it from the paper..but it glues not really strong. Quote
Chopper Posted February 12, 2018 Posted February 12, 2018 Oh right. Yes, if I recall, most of the RS decals are waterslide, but the barcode should stick with just a bit of pressure. Lightly set it on the helmet, so that it's properly aligned, then press firmly on the black barcode bars once you're sure it's in the proper place. You can go over it vertically with the end of a paperback book, or something else that's reasonably stiff, but won't mark or marr the paint job. The black barcode should remain once you pull off the clear part. 1 Quote
Chopper Posted February 12, 2018 Posted February 12, 2018 Also, here's a better photo of the original helmet for you to use re: sticker grey vs snout grey. 1 Quote
762s Posted February 12, 2018 Posted February 12, 2018 i found a darker grey from testors that i have redone my snout with. try a dark grey primer for the snout and a light grey primer for the bolts. or since you have paints ... why not mix a bit of black to your current grays to get a closer match? and then whiten that grey up for the bolts! Quote
kroenen77 Posted February 13, 2018 Author Posted February 13, 2018 Thanks guys...I think that I will use a compromise between the darker nosesticker from RS and the visorscrews to match the snout also. Oh and has somebody a pic and tips how the elastic straps are attached into the helmet?Are they glued on the inside? Quote
Chopper Posted February 13, 2018 Posted February 13, 2018 Oh and has somebody a pic and tips how the elastic straps are attached into the helmet?Are they glued on the inside? That's correct. Here's a photo of how it was rigged on the original helmet that RS Props acquired. I used hot glue to adhere mine to the inside, so I could remove and adjust it without too much trouble in the future if needed. 1 Quote
kroenen77 Posted February 13, 2018 Author Posted February 13, 2018 Ah great..thanks for the pics.I also will use hotglue or ultrastrong velcro. Sprayed the grey snout and the caps with a brighter grey...must look how it looks under daylight tomorrow. How long did you cut your straps? 1 Quote
762s Posted February 13, 2018 Posted February 13, 2018 <snip> How long did you cut your straps? no cutting needed. its one continuous piece. Quote
kroenen77 Posted February 15, 2018 Author Posted February 15, 2018 Ok...I painted my helmet black from the inside..so I can use the RS headband.But I attched it only with very strong velcro on the top and with a wide stripe to make it really stable inside the helmet.Works very good. Painted my helmet like the hero helmet from "Corporal Oberk" in the ROTJ scene with princess leia...here some fast shots from the kitchen table.. : Has his place in my Detholf now...: 3 Quote

Recommended Posts
Join the conversation
You can post now and register later. If you have an account, sign in now to post with your account.