Aliaz Posted December 30, 2016 Share Posted December 30, 2016 Alright, here we go. After a long wait for the suit to arrive I finally am prepared to get started on my soft parts. Gloves, suit and balaclava are in. Armor, helmet and blaster are ordered, and I hope I can get started on my cumberbund soon. 4 Quote Link to comment Share on other sites More sharing options...
Aliaz Posted June 3, 2017 Author Share Posted June 3, 2017 Not much progress here, but got my DVH blaster atleast. 1 Quote Link to comment Share on other sites More sharing options...
Aliaz Posted September 13, 2017 Author Share Posted September 13, 2017 Look what turned up today: Feeling a bit overwhelmed but I'm sure it will work out in the end. Great work from Chef! 1 Quote Link to comment Share on other sites More sharing options...
M.J Posted September 13, 2017 Share Posted September 13, 2017 Max ..Nice!!! Don't be overwhelmed, enjoy your build. We are here to help as well. Mind you the first photo you look like a ninja ..lol 1 Quote Link to comment Share on other sites More sharing options...
Aliaz Posted September 13, 2017 Author Share Posted September 13, 2017 Max ..Nice!!! Don't be overwhelmed, enjoy your build. We are here to help as well. Mind you the first photo you look like a ninja ..lol Ninja scout! I'm sure it will be fine. Just need to get me some tools, all I have in my toolbox at home is a hammer and a screwdriver, don't think that will get me very far... Quote Link to comment Share on other sites More sharing options...
Aliaz Posted September 14, 2017 Author Share Posted September 14, 2017 Helmet arrived today! 3 Quote Link to comment Share on other sites More sharing options...
Eyeslave Posted September 14, 2017 Share Posted September 14, 2017 Good luck with the build. A Dremel is an essential tool to have. And being good with sewing always helps. Quote Link to comment Share on other sites More sharing options...
Aliaz Posted September 14, 2017 Author Share Posted September 14, 2017 Good luck with the build. A Dremel is an essential tool to have. And being good with sewing always helps.luckily my mother in law is great at sewing. Quote Link to comment Share on other sites More sharing options...
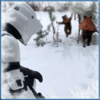
Aliaz Posted September 24, 2017 Author Share Posted September 24, 2017 Alright, set up a temporary table in my mancave, spent the last 2 nights trimming some armor. Terriffied before each cut but getting calmer as I go. And my trusty cat Chewbacca is keeping an eye on me. 1 Quote Link to comment Share on other sites More sharing options...
Aliaz Posted September 27, 2017 Author Share Posted September 27, 2017 I feel pretty happy with the knee, shoulder and forearm armor, Belt and drop boxes. And the hump is atleast starting to resemble a fit with the back armor. 1 Quote Link to comment Share on other sites More sharing options...
Hilikus Posted September 28, 2017 Share Posted September 28, 2017 Good luck with your build Max, looking forward to seeing your progress! Looking good so far - at least for my relatively untrained eyes. Hooray for useful feedback lol. These threads will be invaluable when I get around to order my own kit, so I will be paying close attention Quote Link to comment Share on other sites More sharing options...
Digger Posted September 29, 2017 Share Posted September 29, 2017 remember the screen accurate back armor humps didn't fit perfectly. So don't worry too much about that just now... looking good so far Quote Link to comment Share on other sites More sharing options...
Aliaz Posted September 29, 2017 Author Share Posted September 29, 2017 Thanks guys! remember the screen accurate back armor humps didn't fit perfectly. So don't worry too much about that just now... looking good so far Yeah I guess I’m pretty happy with it. Started working on the chest/back armor aswell. And I got my dremel today, time to start cutting soon. 1 Quote Link to comment Share on other sites More sharing options...
Retrofire Posted September 29, 2017 Share Posted September 29, 2017 You can ensure a good fitting by checking the fit and then wrapping the shoulders in painters tape and use that to adjust. Another thing I recommend is to glue some backing ABS to the front and back pieces where the side straps will go. Over time that area is prone to cracking and the additional thickness will strengthen that area. I had to go back and repair my SC using that method. Keep up the great work! 2 Quote Link to comment Share on other sites More sharing options...
Aliaz Posted September 29, 2017 Author Share Posted September 29, 2017 You can ensure a good fitting by checking the fit and then wrapping the shoulders in painters tape and use that to adjust. Another thing I recommend is to glue some backing ABS to the front and back pieces where the side straps will go. Over time that area is prone to cracking and the additional thickness will strengthen that area. I had to go back and repair my SC using that method. Keep up the great work! Good tips. I guess where I’m at right now with the chest/back is obviously fitting it to my body, but Also how much I need to/should trim. More specifically in these areas, the return edges/sides. Quote Link to comment Share on other sites More sharing options...
Aliaz Posted September 30, 2017 Author Share Posted September 30, 2017 Went on a shopping trip today, found fabric for the bund, off white pouches and off white strapping. And some suede for the riding patches/flap. Quote Link to comment Share on other sites More sharing options...
Chef Posted September 30, 2017 Share Posted September 30, 2017 The return edges only really want to be about 4-5mm. Just to give the appearance of a panel thickness. For the chest/back side straps, sew in a bit of elastic between the two at the back, this allows the strap to expand as you flex, reducing the stress on the armour parts. There should be some in the strapping kit. 2 Quote Link to comment Share on other sites More sharing options...
Aliaz Posted September 30, 2017 Author Share Posted September 30, 2017 Thanks Chef Quote Link to comment Share on other sites More sharing options...
Aliaz Posted October 11, 2017 Author Share Posted October 11, 2017 Not alot of progress since my young padawan is taking up most of my time these days. Slowly but surely getting the armor trimmed. Added some padding to the helmet. Comfortble, but might remove some padding from the big pad so it doesn’t sit so â€highâ€. And glued some plastic washers to the Belt to help spread the load from the rivets. Quote Link to comment Share on other sites More sharing options...
Retrofire Posted October 11, 2017 Share Posted October 11, 2017 Great idea to add the extra shim to spread the load from the rivets. Recommend doing the same to your knees as well as the slots for your strap between the back and chest. That area gets exercised quite a bit when you kit up/down. It will help to keep cracks from forming. Enjoy the little one at every moment! It goes way too fast. I brought mine home what feels like yesterday and he's 9 now😬 Sent from my VS985 4G using Tapatalk Quote Link to comment Share on other sites More sharing options...
Aliaz Posted October 11, 2017 Author Share Posted October 11, 2017 Great idea to add the extra shim to spread the load from the rivets. Recommend doing the same to your knees as well as the slots for your strap between the back and chest. That area gets exercised quite a bit when you kit up/down. It will help to keep cracks from forming. Enjoy the little one at every moment! It goes way too fast. I brought mine home what feels like yesterday and he's 9 now😬 Sent from my VS985 4G using Tapatalk That’s the plan. Oh I agree, time flies when it comes to kids. Almost an entire year has passed and it seems like yesterday we came home from the hospital. Quote Link to comment Share on other sites More sharing options...
Aliaz Posted October 13, 2017 Author Share Posted October 13, 2017 Did some trimming on the return edges, not 100 % finished but pretty happy with them. Quote Link to comment Share on other sites More sharing options...
The Wayner Posted October 14, 2017 Share Posted October 14, 2017 Quick question for you and others here-I’m guessing it’s better to purchase armor first so you can see where the chest/back plates rest on body so you can measure how high the cummerbund needs to come up? I’m assume it can’t come too high because you would see underlap on side and arm out area? Just watching and reading while taking notes. Appreciate your wip thread. It’s so helpful and comments for those of us about to pull trigger and build too. Thanks. Quote Link to comment Share on other sites More sharing options...
Retrofire Posted October 15, 2017 Share Posted October 15, 2017 Quick question for you and others here-I’m guessing it’s better to purchase armor first so you can see where the chest/back plates rest on body so you can measure how high the cummerbund needs to come up? I’m assume it can’t come too high because you would see underlap on side and arm out area? Just watching and reading while taking notes. Appreciate your wip thread. It’s so helpful and comments for those of us about to pull trigger and build too. Thanks. The bund shouldn’t go any higher than the strapping between the chest and back armor and sit just above your belt at the waist. You can work on the flight suit, vest and boots if you want to wait for the armor to come in before you make it but you should be able to make some assumptions regarding length and width. 2 Quote Link to comment Share on other sites More sharing options...
Aliaz Posted October 17, 2017 Author Share Posted October 17, 2017 Getting ready to cut slots in the armor, but holy hell I’m terrified. Tried a few practice cuts with the Dremel on some spare plastic and didn’t like how it went, any tips? High RPM, low RPM? Quote Link to comment Share on other sites More sharing options...

Recommended Posts
Join the conversation
You can post now and register later. If you have an account, sign in now to post with your account.