The Wayner Posted October 18, 2017 Posted October 18, 2017 I’ll give this advice from cutting gauntlets for my Mando/Fett project, low-mid RPM. It will kinda drag on your Drimmel but will allow you to control your cuts without it “jumping†on ya. Too fast and if it hits a snag, it will jump and cut where you don’t want. Easy and slow. When in doubt, use a blade in corners and exact cut areas. Quote
Aliaz Posted October 19, 2017 Author Posted October 19, 2017 Thanks for the advice. Also got a good tip from Chef to use a router bit instead. First attempt at a flak vest. Arms were much to tight since I didn’t take into account the shrinkage when sewing the lines. (My wife did tell me but did I listen? :lol) And the arm was to long. But try, try again. Quote
Digger Posted October 19, 2017 Posted October 19, 2017 what kind of padding is inside your flak sleeves? Quote
Aliaz Posted October 20, 2017 Author Posted October 20, 2017 what kind of padding is inside your flak sleeves?Don’t know the english word for it. It’s just padding I bought at a local craft shop. Quote
Aliaz Posted October 20, 2017 Author Posted October 20, 2017 Some progress made today. Cut the slots on most of the armor pieces (not my cup of tea, felt like I could destroy everything with every cut) , drilled holes for the rivets on the Belt/knee armor, glued on the rivets in the bicep/TD. /2910c86364886b3cff524cd1c63f7457.jpg[/img] Also put together the chest/back armor with marking tape and Tried it on with the belt. I did overlap the armor to make it fit better, how does it look? And is the belt situated right? To high/low? And of course I had to put the helmet on and feel like I’m closer to becoming a Scout. 1 Quote
Retrofire Posted October 21, 2017 Posted October 21, 2017 It’s looking great. Your chest and back armor are sitting at the perfect height on your torso. Your belt should be around the middle of your belly button so use that as your gauge. The height between the belt and chest are critically important since that’s the measurement you will use for your cummerbund. For your rivet connections in the knees I would glue in a small shim made of scrap plastic to strengthen that connection. Make sure you add washers over the rivet before you install as that distributes the pressure and minimizes the chance of cracks. Quote
Aliaz Posted October 21, 2017 Author Posted October 21, 2017 It’s looking great. Your chest and back armor are sitting at the perfect height on your torso. Your belt should be around the middle of your belly button so use that as your gauge. The height between the belt and chest are critically important since that’s the measurement you will use for your cummerbund. For your rivet connections in the knees I would glue in a small shim made of scrap plastic to strengthen that connection. Make sure you add washers over the rivet before you install as that distributes the pressure and minimizes the chance of cracks. Thanks. Still terrified everytime I cut the armor but no huge mistakes yet. Plan on doing the washer and plastic on the knees. Good to see some progress. Quote
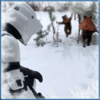
Aliaz Posted October 22, 2017 Author Posted October 22, 2017 Mock up of the belt, input welcome. Quote
Chef Posted October 24, 2017 Posted October 24, 2017 Looking good. Remember the straps at the back join the belt much closer to the middle than where you have them now. (effectively under the corners of the Thermal Detonator) That might pull your drop boxes up a bit (which isn't too much of a drama), but be careful they don't go too high. 1 Quote
Aliaz Posted October 24, 2017 Author Posted October 24, 2017 Looking good. Remember the straps at the back join the belt much closer to the middle than where you have them now. (effectively under the corners of the Thermal Detonator) That might pull your drop boxes up a bit (which isn't too much of a drama), but be careful they don't go too high. Good point, thanks. Adjusted it and they now sit at just over 2 †below the Belt. 1 Quote
Aliaz Posted October 25, 2017 Author Posted October 25, 2017 Finished the forearm armor, just have to sort out the straps for the bicep armor and they will be done aswell. Knee armor would have been finished but my rivet gun decided to be a bitch and refuse to grip the rivet after snapping of a small piece of it... Quote
Digger Posted October 27, 2017 Posted October 27, 2017 I had a problem with the knee rivet yesterday aswell. Apparently the rivet was too small for a folded elastic+washer+kneecap. The washer sprang out in the last second so i have a rivet stuck holding nothing. If the rivet is stuck you could cut off the broken piece using a strong wirecutter and then drill the rivet out Is that the normal elastic band? looks like it is reflecting light. Quote
Aliaz Posted October 27, 2017 Author Posted October 27, 2017 Yeah I messed up getting the rivet out (Tried to cut away the plastic washer so I could cut the rivet on the inside but that went wrong) and got a big crack/gash in the knee armor, so I’ll have to get a replacement. But the other knee armor is complete and riveted, so halfway atleast. That must be a trick of the light, it’s just ordinarie black elastic. Another little test fitting: The straps for the drop boxes are closer now than the last picture, might have adjusted to far and the are hanging a bit low. The back strap of the belt is Currently waiting for my wife to sew on velcro so just tape for now. :lol Realised I will need some velcro to keep the bicep armor up. Done a little trimming on the shoulder connection on the chest/back armor. Pretty happy with the back part but Should I do trim more from the chest part to eliminate the gap seen in the last picture. Or heat it a bit? Or is it fine like it is? 1 Quote
Retrofire Posted October 28, 2017 Posted October 28, 2017 Your chest is looking pretty good. You might want to wait until you get your strapping together before cutting on it any further. Here’s a side view of mine: The shoulders on mine have been trimmed and I used a heat gun to “flatten†them down a bit. Your drop box strapping is coming along ideally you want the boxes to be anywhere from 3-5 cm from your belt so you’ll want to bring those up a bit. It’s looking great so far! Quote
Aliaz Posted October 29, 2017 Author Posted October 29, 2017 Your chest is looking pretty good. You might want to wait until you get your strapping together before cutting on it any further. Here’s a side view of mine: The shoulders on mine have been trimmed and I used a heat gun to “flatten†them down a bit. Your drop box strapping is coming along ideally you want the boxes to be anywhere from 3-5 cm from your belt so you’ll want to bring those up a bit. It’s looking great so far! Thanks, I’ll do the strapping first and see if I need to trim more after that. Belt is now riveted and velcro sewn on the belt, will adjust the drop boxes ans sew them to the belt aswell. Quote
Aliaz Posted October 31, 2017 Author Posted October 31, 2017 Another test: The bund is just mocked up with fabric. the pouch and cod paper (templates taken from the Lancer Build thread). And the pouch is obviously to small. Just trying to figure out the sizes. Pretty happy with how the chest/back armor sits, just need to get around to making the slots for the strapping. Drop boxes adjusted, moved the straps in the back closer to the middle. And my wife messed up while making a first attempt at a flak vest (arms to short and tight) , so she wants me to ask if the length of the arm on the T-shirt before she begins working on it again. Also is the entire chest indent painted grey or just the bottom of it and not the raised Sides? Quote
Chef Posted November 1, 2017 Posted November 1, 2017 The flak vest should come down about 1/2" below the bottoms of the shoulder bell. Chest indent. Well... I tend to paint the whole of the indent. Keeps it more 'square' looking. Keep em' coming. Quote
Aliaz Posted November 1, 2017 Author Posted November 1, 2017 The flak vest should come down about 1/2" below the bottoms of the shoulder bell. Chest indent. Well... I tend to paint the whole of the indent. Keeps it more 'square' looking. Keep em' coming. thanks. How much should the cumberbund overlap under the chest armor? It should stop at the belt not go under it right? Finished my TD. 1 Quote
Retrofire Posted November 1, 2017 Posted November 1, 2017 Your bund should be right at the top of your belt and not under it. It should go up to around half way between your strapping holding the chest and back armor together and no higher. You shouldn’t be able to see the bund above those straps. Quote
Aliaz Posted November 1, 2017 Author Posted November 1, 2017 Your bund should be right at the top of your belt and not under it. It should go up to around half way between your strapping holding the chest and back armor together and no higher. You shouldn’t be able to see the bund above those straps. Thanks. Quote
Digger Posted November 2, 2017 Posted November 2, 2017 Where / how did you get the black belt clips for the TD? Quote
Aliaz Posted November 3, 2017 Author Posted November 3, 2017 Where / how did you get the black belt clips for the TD?i dont remember where I got them. It was pretty much the first thing I bought about a year ago, saw a link while lurking around the forum. Quote
tidalforce Posted November 3, 2017 Posted November 3, 2017 Where / how did you get the black belt clips for the TD? http://www.theclip.com/store/metal-belt-clip-661-tempered-belt-clip.html (credit to BikerScout007) Quote
Aliaz Posted November 3, 2017 Author Posted November 3, 2017 http://www.theclip.com/store/metal-belt-clip-661-tempered-belt-clip.html (credit to BikerScout007) Yep, That’s the one. Quote
Aliaz Posted November 6, 2017 Author Posted November 6, 2017 Chest/back armor pretty much done. Pretty happy with the slots I managed to cut. Still have to attach the drop box straps to the back of the belt. The cod piece template might be a little big? Waiting on my DVH tank topper but got the stripes done on the tank. Time to get started on the bund and pouches. 2 Quote

Recommended Posts
Join the conversation
You can post now and register later. If you have an account, sign in now to post with your account.