Retrofire Posted November 16, 2016 Posted November 16, 2016 Nice work! I've been puzzling that out for my blaster. Hope you don't mind if I use your idea. 1 Quote
StoutScout Posted November 17, 2016 Author Posted November 17, 2016 Nice work! I've been puzzling that out for my blaster. Hope you don't mind if I use your idea. I can't take all the credit. Shada gave me the idea. I hope it works out for you! 1 Quote
StoutScout Posted December 28, 2016 Author Posted December 28, 2016 The day has finally come! My helmet arrived today and I couldn't be more happy with it. Spike does great work! Such a great feeling to turn all of the items in my signature green! Pre-Clearance Thread 2 Quote
KDuB Posted December 28, 2016 Posted December 28, 2016 Wow, Great work man!!!! I am def going to use your TD magnet idea..... 1 Quote
StoutScout Posted December 28, 2016 Author Posted December 28, 2016 Wow, Great work man!!!! I am def going to use your TD magnet idea..... Thanks. I can't take credit for the magnet idea, I got that from Pandatrooper's build thread. And if I had to do it all over again I would take the approach Inklegg mentioned earlier in this thread. Quote
kayelbe Posted February 6, 2017 Posted February 6, 2017 I know your TD is already done, but wanted to share my "trick" since you said it was a pain. Maybe it will help someone else. I put my magnets with zip ties in heat shrink tubing, heated it to shrink it, then just zipped them around the tube. Sent from my iPhone using Tapatalk Just saw this. I abandoned doing the magnets the way Panda did, because I couldn't seem to get the magnets inside the tube and lined up with the holes AND rivet them in. This is a great idea, and MUCH simpler! Going to steal this one for sure! 2 Quote
Kosejonas Posted April 3, 2017 Posted April 3, 2017 I took Mickey's suggestion and shortened he cummerbund (by completely re-doing it!). I'm happy with the result of the new bund (new one on the right compared with the old one): Next I worked on the lancer knee straps. First up was gluing some extra ABS supports into place: After the glue dried I gathered the tools necessary for the job: I cut a length of elastic and taped it into place. Masking tape has been the unsung hero of my build! I left the elastic taped in place, held it firmly against a scrap piece of wood and slowly drilled into the knee armor using a 1/8" bit: Here is the resulting hole: I removed the tape and slipped a 1/8" rivet and backing washer into place: Took the rivet gun to it: The completed rivet from the outside: ...and inside view: Final step for lancer was to paint the rivets white: Can someone correct me if I'm wrong, but these are the only rivets that get painted white correct? The rivets on the holster and belt stay silver? The rivets here are supposed to be silver if your going for Lancer: Link to lancer specs 2017 http://forum.bikerscout.net/index.php?showtopic=15994 Quote
StoutScout Posted April 3, 2017 Author Posted April 3, 2017 The rivets here are supposed to be silver if your going for Lancer: Link to lancer specs 2017 http://forum.bikerscout.net/index.php?showtopic=15994 Yep. This was changed after I painted them. When I go for Lancer I'll be changing them back to silver. Sent from my SAMSUNG-SM-G920A using Tapatalk Quote
Kosejonas Posted April 4, 2017 Posted April 4, 2017 Yep. This was changed after I painted them. When I go for Lancer I'll be changing them back to silver. Sent from my SAMSUNG-SM-G920A using Tapatalk Cool! But over to the important stuff! GREAT build mate! 1 Quote
StoutScout Posted June 9, 2017 Author Posted June 9, 2017 I've never really been fully satisfied with the way my TD turned out and ever since ShaunPug posted this thread I've been wanting to do the upgrade. I did just as Shaun's thread describes, went to the hardware store, bought two cheap 12 ft extension cords, cut off the ends, pulled them apart and carefully wrapped them around each end of a 1 3/8" clear braided vinyl hose, and glued them on. You can see the results in the background of the picture below. In the above picture I am showing off my method for adding the Lancer concave end caps to my new TD. All I needed to do was take my wife's old hair dryer, set it on hot, carefully heat the middle of each of the flat end caps and then when they were soft I pushed that green ball into them. It took a couple of iterations but I'm happy with the results. Next painting. I used some cheap acrylic paint (Ceramcoat Rain Grey) I got from JoAnn's fabric store, a paintbrush and some sealer. I decided to paint by hand instead spray paint because I was not happy with the spray paint results on my original TD. I then drilled in two holes and added the clips I got from theclip.com. Finally I glued on the newly modified end caps and am extremely pleased with the results: 1 Quote
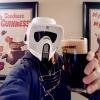
StoutScout Posted June 16, 2017 Author Posted June 16, 2017 I will start off by saying, YES I KNOW SCOUTS DIDN'T HAVE VOICE MODULATORS! There now that that is out of the way I decided to have a little fun with installing a cheap voice changer into my helmet. I've never really liked the sound of my voice while in costume, I don't feel like I sound intimidating enough, so I started looking into voice modulator options. Recently on a trip to Wally World I found this gem for less than $8: The 'Old Man' voice option modulates your voice deeper, somewhat similar to Kylo Ren's in the Force Awakens. I decided this was worth messing around with. I took the toy apart: The wires are way too short to work in the helmet so I picked up some 28 guage wire from my local hobby shop, a cheap soldering iron and solder from Harbor Freight: After cutting new lengths of wire, removing the old wires, soldering on the new wires, and taking Lexan scissors to the toy to remove unnecessary plastic, I ended up with this: I then added various pieces of sticky back velcro and positioned the components around the inside of my helmet. My setup allows for me to 'store' the voice changer in the back of the helmet if I chose to go with just my voice amp setup. Back of the helmet when voice changer is in place for use: Front of the helmet when voice changer is in place for use (basically the speaker and microphone put in place) Note the microphone for my wireless voice amplifier setup is positioned in front of the speaker of the voice changer: Here's the back of my helmet when the voice changer is taken out of use. In this picture you can see that I added a pad for comfort covering the soundboard box of the voice changer : And here's the front of my helmet with just my wireless mic installed and the voice changer stuff placed in the back: And for the record here is the helmet closed with everything in place and the wireless amplifier which I stick in one of my front pouches while trooping: 1 Quote
GirlScout620 Posted June 24, 2017 Posted June 24, 2017 Awesome build Sent from my XT1650 using Tapatalk 1 Quote
StoutScout Posted July 14, 2017 Author Posted July 14, 2017 Working towards Lancer I had one major hurdle to get past with my SC kit: 10. Belt Ideally should be made from a one piece construction with no visible gaps, and not seperated with fabric in between sections, apart from at the back where the TD box sits. Making any joins in a 3 part belt seamless, is highly recommended. So my goal was to turn my 3-piece SC belt into a seamless 1-piece. You saw in one of my previous posts that I created a new TD. I took my old TD end caps, cut them up and made some ABS slurry out of them with acetone: After several days the ABS scraps melted away and eventually enough of the acetone evaporated that I got a perfect slurry: Here is a picture of the seam in the 3-piece belt: Here is after I applied the slurry and let it dry for 24 hours: And finally after a lot of TLC with several different levels of sandpaper: I'm really happy with how this turned out. 2 Quote

Recommended Posts
Join the conversation
You can post now and register later. If you have an account, sign in now to post with your account.