Oblivian Posted December 9, 2015 Posted December 9, 2015 Move along, nothing to see here Another WIP Place holder. Have read a few of the tutorial and other individual parts threads but find cross-information and the gap between the CRL updates confusing, So will use this as a progress and deeper questions location as needed outside the ask-an-armourer Bucket: Altmann (arrived!) GLoves: Wampa (arrived) Balaclava: Ebay Suit: Amazon - RedKap CT-10 (Done!) Boots: DIY - Done1 Armour: SC (arrived)! Bund: DIY (Done!) Proving to be harder to find parts.. Pig Suede locally Quote
Oblivian Posted December 21, 2015 Author Posted December 21, 2015 When your daily 'Joy they're on the way!' happiness updates are let down at the end of the day Taking a LA holiday! Quote
Oblivian Posted December 23, 2015 Author Posted December 23, 2015 Progress. Wampa Gloves: Check (and yes they tight fit even on +1 size) SC kit enroute for start of new year Quote
Oblivian Posted December 27, 2015 Author Posted December 27, 2015 When customs decide the chunks of plastic you purchased from the US to fundraise in need to be held onto and additional money added to their coffers Quote
Oblivian Posted January 6, 2016 Author Posted January 6, 2016 Pinch me.. is it Christmas already? After dishing an additional $140 for release I had a box of plastic turn up today :D:D ANNND then a call from the office of a pickup ready... with a certain unexpected Altmann bucket enclosed. Happy times! Quote
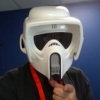
Oblivian Posted January 7, 2016 Author Posted January 7, 2016 And so begins the crazy selfies with half done mods Hopefully start the sanding edges, shoulder trims and decide which T strap method to use on the weekend Sent from my GT-I9300 using Tapatalk 2 Quote
Oblivian Posted January 7, 2016 Author Posted January 7, 2016 Both the SC 'instructions' and Pandas guide tend to lean on making soft Velcro "T" for attaching the front/rear plates on the shoulder. And then covering with the canvas like elastic bands. Still the best way to go? Quote
Oblivian Posted January 9, 2016 Author Posted January 9, 2016 Todays trip to the hardware store ended in some 32mm PVC pipe to end-cap the detonator, and a donor hard hat for the liner (such a waste) Just an idea, and as it turns out may be OK for its purpose. The way it sticks into the lid is small catches. And as it turns out these points can rest on the front of the helmet and places the forehead padding right where it needs to be close to the visor! With some velcro dots behind it this should be able to be seated there semi permanently just fine without too much adjustment The downside is my head still rests on the top of the bucket, and not into the "X" sling itself. On the rear, the intention is to bend a couple of strips of plastic into the shape of the rear. And mount using a screw at each of the the back 2 contact points. In turn this will be attached to a strip foam attached in the 'dent' area of the back of the helmet. And again velcro dot at the lower points to the helmet ridge for added stability Quote
Oblivian Posted January 26, 2016 Author Posted January 26, 2016 Not pleased with how unflat the tank married the back plate (would make it hard to sit the topper on) I took to it with the sanding tip on the dremel today. Small steps since I can take more off but not replace it Before: (dug more on left) After: Sent from my XT1092 using Tapatalk Quote
Oblivian Posted January 27, 2016 Author Posted January 27, 2016 Has anyone curve cut the slots for the drop boxes to avoid trimming too far into the edge of the indent? Allows the slot to be a bit longer than if it were flat. Sent from my GT-I9300 using Tapatalk Quote
Oblivian Posted January 27, 2016 Author Posted January 27, 2016 So while I'm still on holidays, the realisation the last 3 days to do this stuff is upon me, barring running out of weekends to a busy Trooping month. So chop chop, and onto it the last few days. Theres still some farily major cuts and strapping to be done to the front/back - But I'm consulting on correct positioning etc before going nuts with a hot water bath and dremel/cutter Yesterdays acquisition was a bag of 16 various for $10. Has to be made with child labour! And today was sew day. It had to happen. Somewhat permanent slash temporary velcro and elastic added to forearms I can always swap these out with newly acquired snaps/Domes today. But in either case you can't easily loosen or change the way they are put on without some major engineering such as the adjustable version I've seen in a build thread. I got brave with the sanders and dremel tool yesterday, and butchered the shoulder bells Panda style. I've started to lunch the belt, but until I confirm the placing of the last squares I'm yet to take to these with a heatgun and shape to fit around me also TD is 90% done. I just need to work on attaching the greeblies (and its just this second dawned on me I cant glue+press them on with the tube attach.. IDIOT!) I have 1 removable end, to be able to stash pens or whatever in. Along with the Pouches planned, this should still be as handy as the officer kit. Slap of velcro hook onto the collar of the overalls and thats the top half taken care of I still need to add velcro to the knee area, and riding patches and butt flaps. Went to get some faux suede today. But its white backed. And by the look of the CRLs I can't have any visible stitching. So going to clarify that too? Boots have been acquired. But both the vinyl (if stuff I have is not usable) and suede material is pending - roughly $25/m each! What I did get today however, was some reasonably expensive teeshirt material to make the now required vest up. Will need some plastic/ABS for shims and the like shortly. And to attach the snap-domes to make the upper sections a little better fitted than velcro Quote
Oblivian Posted February 4, 2016 Author Posted February 4, 2016 Vest: End it somewhere near the belly button? Long enough to not bunch under the cumberbund. Not long enough to stick out the bottom of it yes? Quote
Griffin-X Posted February 4, 2016 Posted February 4, 2016 Great posts and updates, keep going! The vest rides under the cummerbund, but typically rides like a half shirt. Mine sits just under the sternum but not quite to my BB. Quote
Oblivian Posted February 6, 2016 Author Posted February 6, 2016 Im thinking due heat the shorter the better. So will ensure its low enough for bund but not fall out. Suggestions to what density batting/wadding to install for ribbing? 75-100gm ish? Awaiting E6000 still to progress which is worrying me for March targer Quote
Oblivian Posted February 7, 2016 Author Posted February 7, 2016 Another expensive visit to craft store. White vinyl. Wasnt able to find marine type with less marbelling. But sure as heck hope its passable. Other stuff I got free (PVC) seems too thin, and in depth CRL noted no shine Appears yellow here due lighting Sent from my GT-I9300 using Tapatalk 1 Quote
RavinRace Posted February 7, 2016 Posted February 7, 2016 That looks like the stuff I am using too. Looks good stretched out over the boot. Quote
Oblivian Posted February 9, 2016 Author Posted February 9, 2016 Reassuring My E6000 arrived yesterday, so as long as I use it sparingly on the armour parts I'll have enough for boots! (2oz tube) Now to find those boot calf and bone plans that are eluding me from Army Scout.. Quote
Oblivian Posted February 9, 2016 Author Posted February 9, 2016 You have me worried now. Followed pandas belt, short end out. But see others have done long end out I thought I read approx 1" tail out the back Part way panda'd ready to bend and glue Sent from my XT1092 using Tapatalk Quote
Oblivian Posted February 12, 2016 Author Posted February 12, 2016 Shoulder alignment time. Now I've discovered an issue. Comfortable placement is a bit far back for the shoulder bridges.. Sent from my GT-I9300 using Tapatalk Quote
Griffin-X Posted February 12, 2016 Posted February 12, 2016 The trick for me is the Velcro on the underside of the bells. If you use a 2" piece you can sort of align it when you attach to fit and look appropriately. Quote
Oblivian Posted February 13, 2016 Author Posted February 13, 2016 So the further back join and subsequent bridge cover wont need to be modded to bring forward? And velcro As in don't stick it to the centre like I did.. 1.5 sq atm. I intend to align, get approved then move to a more permanent dome setup Sent from my XT1092 using Tapatalk Quote
Oblivian Posted February 13, 2016 Author Posted February 13, 2016 Vest 2.0. Raglan with padding full length of sleeve acceptable?, or can I start it uner the bell skipping top of shoulder/ so much at front Quote

Recommended Posts
Join the conversation
You can post now and register later. If you have an account, sign in now to post with your account.