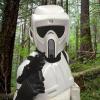
kathgruben Posted February 25, 2014 Share Posted February 25, 2014 I've been a 501st member for several years, and a biker scout has long been on my "to do" list. So when an opportunity to pick up an unfinished suit from a garrison mate came along, I just couldn't pass it up! Here I am giving all of the bits a try-on before handing over my hard-earned cash: As you can see (or not, cuz it's a bit blurry), the suit included almost everything I needed: flight suit, SC armor, moncal boots, gloves, cummerbund with pouches, and a Don Post helmet. So yeah, almost everything. Now, I knew there was some work ahead with the helmet, but on further inspection at home, and after doing some research I discovered I had taken on quite the project! You see, the garrison mate I got this suit from wasn't it's first owner, so the kit was actually about 4 years old and still unfinished. And it seems the original owner had taken a few... *interesting* steps in putting it together (I'll get into that in another post). Fast forward 4 years and many of the standards for TBs have changed to some degree. So yeah, I've got some work ahead of me but looking forward to making this baby my own. 2 Quote Link to comment Share on other sites More sharing options...
Griffin-X Posted February 26, 2014 Share Posted February 26, 2014 It looks like you have all the parts and pieces. The helmet will most likely be the most challenging, if you want to convert it. Best of luck and keep us all posted! Quote Link to comment Share on other sites More sharing options...
Chex Posted February 26, 2014 Share Posted February 26, 2014 Looking forward to seeing your progress, Katherine. Quote Link to comment Share on other sites More sharing options...
bjsavage7 Posted February 26, 2014 Share Posted February 26, 2014 Welcome, Katherine! Looks like you've got only a wee bit of adjustments to do before you are ready to be a Pathfinder! Quote Link to comment Share on other sites More sharing options...
Dart Posted February 27, 2014 Share Posted February 27, 2014 Ah, yes. So this is what it looks like... The helmet's definitely the biggest challenge there. If you've got the time, you should post up some photos (front, back, left, right) just so we can help you spot the issues. Good luck, Kath! Quote Link to comment Share on other sites More sharing options...
kathgruben Posted February 27, 2014 Author Share Posted February 27, 2014 Thanks for the warm welcome guys! I know I'm in the right place for feedback and guidance as I go through this build I've done a fair bit of research on BSN to figure out all the mods needed to "shrink" this suit down to Kat size, and to learn some of the how-to's. Threads I'm referencing heavily: Pandatrooper's WIP thread for general build info. Winterg's DP Bucket Mod thread, which includes the link to Heathrowtrooper's PDF how-to. And miqt's Awesome Wife thread for size reference, because I'm about the same size as she is. Details and pics to come! 1 Quote Link to comment Share on other sites More sharing options...
kathgruben Posted February 27, 2014 Author Share Posted February 27, 2014 After having a thorough look through all of the parts I bought and then checking the CRL, I determined that the only thing that won't need any mods are the boots LOL! Alrighty, time to dig in... First I decided to tackle the flightsuit, primarily because most of my previous build experience has involved sewing something and it's what I'm most comfortable with. So soft parts get worked on first. My first impressions of the flightsuit was that it was a bit big for me, but I could work with that. Closer inspection of it once I got everything home revealed a strong aversion to needle and thread. Velcro squares for the shoulder and bicep armour had been adhered to the suit using hot glue (ugh). Also, the legs had been cut shorter for someone of my height (5'2") but left unfinished. Okay, I should still be able to work with that. I did my best to remove the velcro and glue, because if I was going to use this suit I'd have to reposition the velcro anyways. I got most of it off, and what remained would be covered either by the vest or armour. Okay, I'm pretty sure I can still work with that. I also removed some of the zippered pockets on the legs since they only added bulk. I put the suit through the sewing machine and tried it on. Now, for previous projects taking in the seams of a top or pants at the sides has been enough to make it fit better and still be useable. Unfortunately, that was not the case with this and it only made the thing more uncomfortable to wear. Nope, I can't work with that. Okay then, custom flightsuit it is for me! Yay! 1 Quote Link to comment Share on other sites More sharing options...
kathgruben Posted February 28, 2014 Author Share Posted February 28, 2014 Ooooo! Looky what came in the mail! Pew pew! 1 Quote Link to comment Share on other sites More sharing options...
EnigmaEngine Posted February 28, 2014 Share Posted February 28, 2014 Ooo. Which is it? It looks big, but I imagine you have daintier fingers than my freakish, bulky man-hands. Quote Link to comment Share on other sites More sharing options...
M.J Posted March 1, 2014 Share Posted March 1, 2014 Katherine!!!! great to see you here.....I made a two piece suit.....black shirt and black pants and did all the mods! Good luck with your build Quote Link to comment Share on other sites More sharing options...
kathgruben Posted March 1, 2014 Author Share Posted March 1, 2014 Hey Kelly! Good to be here I've gone ahead and made a one-piece suit (post on that forthcoming), but might decide to go for a two-piece down the road. Ooo. Which is it? It looks big, but I imagine you have daintier fingers than my freakish, bulky man-hands. LOL indeed, I do have smaller fingers so it might look a bit big The pistol is from NegativeEleven and I can tell you it fits perfectly in my boot holster. I'm pleased with it. Quote Link to comment Share on other sites More sharing options...
kathgruben Posted March 3, 2014 Author Share Posted March 3, 2014 I did tackle the flightsuit first and it's all done, but I need to take some pics of it still before I post. This weekend I worked on several things, one of which was the belt. You can see in this pic why I mentioned earlier the aversion to a needle and thread: The original work on this belt is most definitely not up to standard with all of those rivets in the webbing. And unfortunately because it was riveted together it won't be up to Lancer spec, but it should pass for regular approval once I'm done. I started by cutting off all of the riveted webbing and I drilled out the rivets that were used at the back to connect the belt boxes to the main belt. Since my cummerbund pouches are white, I picked up white cotton webbing to replace the nylon stuff. Using Pandatrooper's thread as a guide, I pinned one end of the webbing to the belt, threaded the clips and boxes in the proper order and orientation (those clips can be tricky) through the front of the belt and then repeated again for the other side. After testing the fit to make sure the boxes didn't hang too low, I cut the webbing and sewed it in place at the back connection points. Once I get the greeblies on the detonator, this bit will be done. Quote Link to comment Share on other sites More sharing options...
kathgruben Posted March 4, 2014 Author Share Posted March 4, 2014 As you know, SC armour comes pretrimmed and almost ready to wear... if you're an average Joe. In my case, since the armour didn't appear to have been modified at all, the biggest thing to tackle was to shrink and form everything down to little girl size. First I had to do some prep. Again, I encountered the fear of needle and thread - staples (ugh!) were used to attach all of the velcro to the elastic straps. Needlenose pliers made quick work of those! And originally, all of the elastic straps were 1 3/8" wide, so needed to be replaced with 1" for the forearms and knees, and 2" white webbing for the chest. I also had to remove the velcro that was glued onto the armour bits because the amount of trimming I had to do meant moving the existing slots back and changing the placement of the velcro. Pliers are awesome To begin the shrinking process, I started with the shoulders, biceps and forearms. First, they got the boiling water treatment to increase the curvature for a better fit. Then, I removed anywhere from 1/4" to 3/4" around each piece and re-cut the slots. Having worked with styrene before, I expected the ABS to snap easily after scoring with a knife but this was not the case. ABS is a lot softer and usually prefers to split instead, so I used a dremel most of the time. Once trimmed and I had the elastic strapping redone I did a test fit, especially for the shoulder bell size and placement. I wanted to make sure the shoulder bell was the right length with the proper gap between it and the bicep before finishing by rounding the corners of each piece. I frequently referenced miqt's aewsome wife's pics for sizing (Thanks Mike!). Next, I made the shoulder bridge straps and shoulder T straps as per Pandatrooper's method (Thanks Terry!). And lastly, I needed to fix the pin stripes on the tank. Not sure what reference was used originally, but curved corners and mismatched rank bar lengths definitely needed to be fixed. After drafting the lines out with pencil, I cut my tape bits and applied them. (sorry for the bad pic, makes it look crooked). Quote Link to comment Share on other sites More sharing options...
EnigmaEngine Posted March 4, 2014 Share Posted March 4, 2014 Man, that tank striping and rank bars are like night and day. Great job! Quote Link to comment Share on other sites More sharing options...
jameserec Posted March 5, 2014 Share Posted March 5, 2014 Nice work so far. I'll be referencing your build to help with mine once my bits come in. Excellent pics of the details. I was not aware of the boiling water trick to adjust the shape. Quote Link to comment Share on other sites More sharing options...
Griffin-X Posted March 6, 2014 Share Posted March 6, 2014 You are doing an awesome job. Very impressive! Keep up the great work! Quote Link to comment Share on other sites More sharing options...
FutureAlexx Posted March 6, 2014 Share Posted March 6, 2014 Really neat job on the striping. I'll definitely keep an eye on it and look forward to see what you'll come up with. Regards, Alex Quote Link to comment Share on other sites More sharing options...
M.J Posted March 9, 2014 Share Posted March 9, 2014 Kath I'm lovin the selfies, I want some smiles. Your doing a great job! Quote Link to comment Share on other sites More sharing options...
Dart Posted March 11, 2014 Share Posted March 11, 2014 Don't mean to hijack Kath's thread, but I had the pleasure of seeing her in action with it this past weekend. She's still got a few challenges, but it's lookin' good so far! 2 Quote Link to comment Share on other sites More sharing options...
kathgruben Posted March 18, 2014 Author Share Posted March 18, 2014 Thanks for all of the compliments guys! LOL @M.J, smiling at yourself is just so weird Thanks Dart I had tons of fun a couple of weekends ago hanging out with Dart and the Canadian Garrison at Toronto Comicon, where I gave my scout a test run. I definitely have a few more tweaks to make, and I gotta tackle the helmet next, but with most of the suit done I had a blast! What made this event even more fun was that all four scouts who trooped were women of a similar height and size. Biker chicks rock Love this pic taken by Rob Olsen of Geek Inked Magazine. That's me there, the fuzzy one on the left After the con I had to take some time to get caught up on a few real life things but now, back to the build! Okay. Earlier I had mentioned that I worked on the flightsuit first. It's definitely one of the things I needed to have on hand when test fitting the various armour bits. Remember this? Yeah, that suit was much too big for me, and since it should be fitted and not baggy I decided the easiest thing to do was to make mine from scratch. So I took this... ...and made this. Ahhh, much better! For the saddle patches and butt flap, first I mocked them up with some scrap fabric. Then I cut them out of black suede that I harvested from an old leather coat I picked up at the second hand shop. Threw on the knees and cummerbund while testing the length of the saddle and placement of the thigh straps, and then sewed the straps and saddle to the suit. The butt flap is attached to a removable belt so that the suit is machine wash and dry. Next up, the vest. 3 Quote Link to comment Share on other sites More sharing options...
kathgruben Posted March 21, 2014 Author Share Posted March 21, 2014 Putting the vest together was pretty straight forward with the only tricky part being trying to figure out the sleeve length. With the CRL stating "...the sleeves should end just slightly longer than the bottom edge of the shoulder armor" it was important to get this part just right. For my vest pattern I used one for a short-sleeved pullover shirt and modified the back part to include an additional 2" for the velcro closure. For the fabric I used the same black cotton that I used for my flightsuit, but this time I doubled it to get the weight it needed. As mentioned, the sleeve is special because it needs to be just the right length, it can't have a hem around the cuff and it needs the ribbing added. Not having a hem and having the ribbing means that the sleeve needs to be doubled as a folded over mirror image of itself with a layer of quilt batting in between. To do all this you need to know the correct length before you cut your fabric. So first I cut one sleeve out of some scrap fabric and temporarily attached it to the vest. I threw on the chest, shoulder and bicep armour to check the length. Here you can see it's a bit long and the bicep armour overlaps at the sleeve cuff. I marked the correct length and double checked it without the bicep on. I also marked the ribbing lines on the test sleeve to check distance and scale. I decided on 1" between ribs looked best for me. So with all of the testing done I removed the test sleeve and used it as my new pattern piece. For my good fabric I folded it in half where the cuff edge goes to get my mirror image, and then cut my quilt batting to sandwich in between. Then I transferred my rib lines and sewed those in. Attached the sleeves to the vest, finished the bottom hem, sewed on the 2" velcro at the back (right over left!), and voila! The vest is ready Front: Back: 2 Quote Link to comment Share on other sites More sharing options...
miqt Posted April 14, 2014 Share Posted April 14, 2014 GO KAT! Yeah! Great looking work. Quote Link to comment Share on other sites More sharing options...
Al74 Posted April 15, 2014 Share Posted April 15, 2014 This is a Great thread & very informative. Love to see people making things their own. Thanks Kat. Quote Link to comment Share on other sites More sharing options...
kathgruben Posted April 17, 2014 Author Share Posted April 17, 2014 Thanks guys I'm in a holding pattern at the moment, waiting to receive a new snout from MonCal for my helmet rebuild. Hopefully it gets here soon! 1 Quote Link to comment Share on other sites More sharing options...
kathgruben Posted May 7, 2014 Author Share Posted May 7, 2014 Just got an email today from MonCal that my snout shipped yesterday! Yay! I'm guessing USPS will take about 2 weeks to get here, so hopefully I'll have something to show you shortly after that 1 Quote Link to comment Share on other sites More sharing options...

Recommended Posts
Join the conversation
You can post now and register later. If you have an account, sign in now to post with your account.