

StarHawk
-
Posts
54 -
Joined
-
Last visited
-
Days Won
1
Everything posted by StarHawk
-
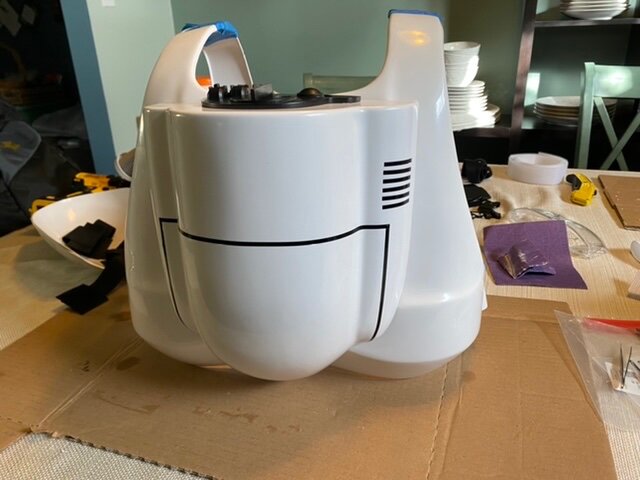
Update on Helmet...Managed to black out the inner helmet with electrical tape and left the earhole open. Inner ear along the crack line did 3 days worth of ABS slurry on top of small brace. Outside of helmet 2 thin layers of slurry but it looks a little well...."rugged" upon close inspection as seen in the photo below. Anything I can do to smooth that out? Tried some light sandpaper but was very tentative thus far. The inner brace and slurry coat seem to be holding really well in terms of strengthening this point. Also did a layer on my cracked kneepad which went better than the helmet since i didn't add any to the outside as seen in second/third photo.
-
I do luckily have those bolts! I will replace the current bolts with them. Just to clarify the mesh on the inside is not for Lancer even though I have the ears cut? The 4th picture best shows this. I currently have black pads covering the holes to not allow the inner white to show from the outside but the black gaffers tape sounds like a better idea. Thanks for any input!
-
Yeah the bolts don't seem to be able to hold without going nuts on a tightening and I'd rather avoid damage. I will get some styrene and see what I can do!!
-
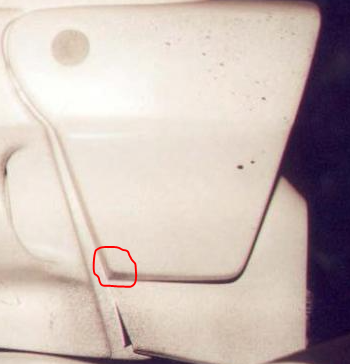
The visor slides pretty nicely into place without bending or pushing much thankfully though that does not mean It could be improved. I will give credit to SC for a good product. I believe that I caused the cracks by the ear's on my initial cuts. Then today when replacing the webbing inside the ear's I fully cracked it by being a bit too heavy handed. I would very much appreciate any tips in regard to bracing for the upcoming repair as once I am done with the helmet I cracked a knee by being overzealous during BAT so that too will need a brace/ABS slurry. I took a bad angle shot but the left ear crack is very minor on the upper helmet side portion of the ear hole, again caused by my amateur hand which hopefully a small amount of slurry will fix. It would be nice if the visor could hold itself open and I do understand that it is not needed and while that is said would still look for any advice in regard to getting it to do so as it is a feature I really like.
-
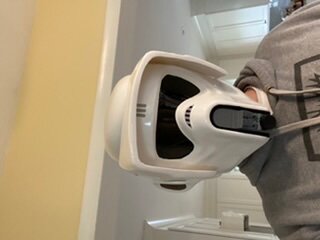
So it's been over a year since my first troop and I finally started to sit down to make some adjustments which will turn out to be hopeful improvements. I am currently waiting 24 hours for some ABS slurry made from the trimmings of my armor to come together to repair some cracks but was wondering how my helmet has stood up and what fixes/repairs I can make with the guidance of the Pathfinders. Please send me comments/tips/critiques so I can get this helmet back in action!! Photos to show current state of helmet below. Major Issues: Big crack in right ear Small crack left ear Visor does not sit open without being held Minor Issues: Cut outs are a little rough might need to sand again inner cushioning does not work well need ideas to replace Need to replace right ear inner webbing but I have plenty just need to repair cracks first Desired Improvements: Lancer requirements met Visor sits open without assistance Originally purchased as a SC untrimmed helmet.
-
I just got through a SC build and submitted for approval, I would highly recommend using the RS Props build video tutorial for the scout armor plastic pieces. Everything that they do worked for my SC kit and translated well. Good luck on your build and listen to the brass here they are spot on with their recommendations. I have linked the first video for reference.
-
-

-
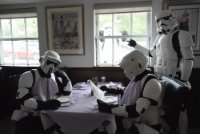
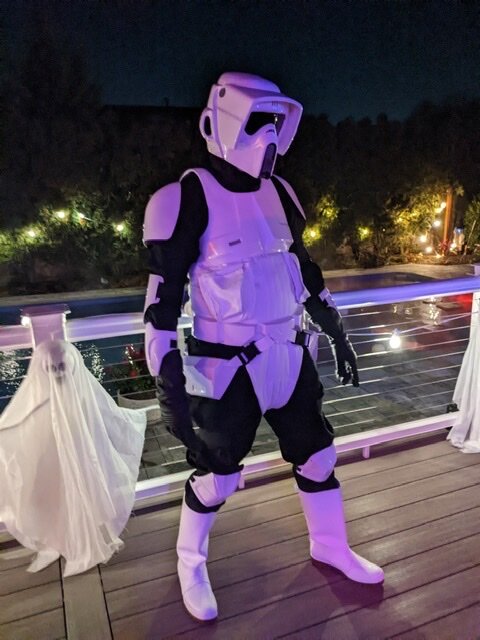
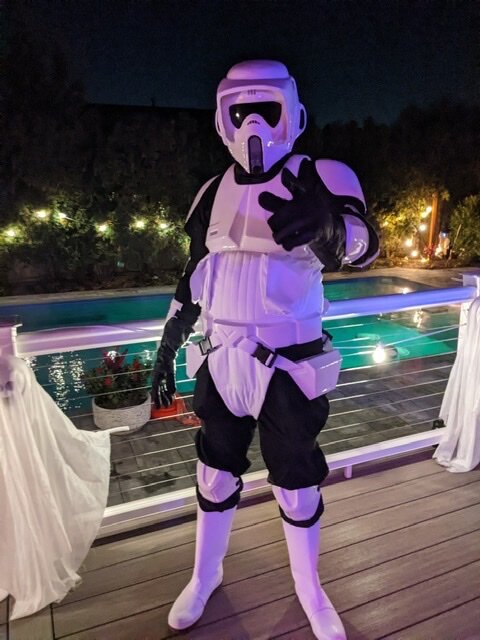
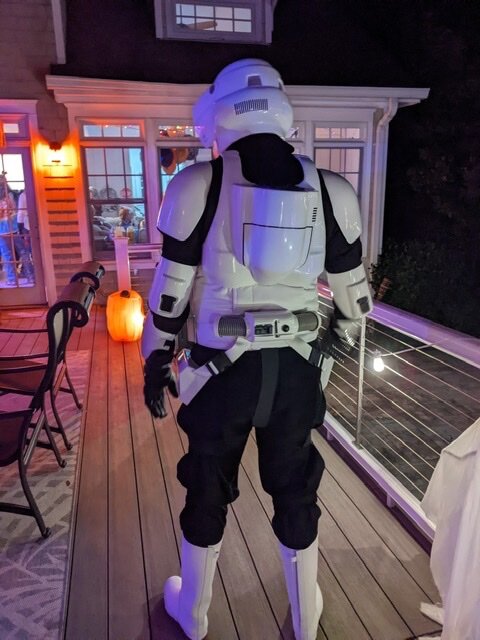
Well I have finally assembled all the pieces and done a test fit. Looks like I could use a bit of tailoring on the flight suit and just some small adjustments to really iron out the build but it is now fully wearable. Will post some pictures here and am going to see my detachments GML to go over fine details and any fixes I may need. Incoming pictures to follow and thanks again to all the help and excellent advice pathfinders. I do know that one of my pouches is incorrect and have emailed IB to see if I can get sent a replacement.( I have two left pouches currently). Otherwise I think it's all in order but look forward to any comments and improvements.
-
Quick test fit shot:
-
New round of pictures: 11-16 in updated album: https://imgur.com/a/tsPVneq Specific work done so far has been Helmet to 90% complete with padding/visor/decals and the ear mesh under the cutout earholes. Still need to get the FIT down and clean up any rough edges. https://imgur.com/Tpujl88 https://imgur.com/QCd4t2J Back tank has been riveted and strapped to the back plate with rivets and greeblie plus the pinstriping. https://imgur.com/mb4DUxL https://imgur.com/yEdY2Uy https://imgur.com/5r08k3G Biceps strapped up and glued on greeblies: https://imgur.com/kSC8ssE Moving onto the belt / cumber bund / and jock strap next!
-
The alcohol worked like a charm!!! I’ve got almost all the hard pieces strapped up now. Adding liner and padding to the helmet and trying to figure which of the 10,000 straps they sent me are which so I can get the belt setup. Thanks as always for the swift and effective ideas!
-
After working on the visor more I have a bit of residual e6000 glue on the visor that bled onto the front. What would you recommend to clean the visor and remove the glue? Thanks!
-
I appreciate all the info and advice thank you! I ended up going with the foam pads for the helmet and got all my straps setup on the main armor pieces! I am having a fellow garrison member over to help me with the minute details and adjustments and will try to get everything strapped up for photos. This has been a tough build as I am new to it but really looking forward to trying it all on.
-
Fantastic! I will use a small amount of the cement just want to create and maintain the nice line. Next question is inner helmet cushioning and support. Any recommendations for comfort and fit? I am already going to be adding a small padding to the inner nose just below the visor but wanted to see options for inner helmet stability and padding. Thanks for any and all ideas / recommendations!
-
I am talking about the visor and the face plate which I currently have only together by the bolt going through all 4 pieces. There is no other adhesion on mine and was wondering if you reinforce with a little glue or tape at this point here:
-
I am so relieved to hear that the gap is normal!! I thought I was off target and was going to need to redo the holes. Thank you so much for the link I am going to order those right now. On the SC helmet there is not a lot of places where the visor touches the face so I am only using a little bit of e6000 where the masking tape is in my pictures do you guys find that the two pieces separate at all while trooping or use a different method of adhering them together? The Kropserkel build video used double sided tape but also has a bit of a different shape which allows for that tape to be hidden. Thanks for any and all input!
-
Began tackling the next steps on the build. Adding on the remainder of the decals and the part I was worried about... bolting and riveting the helmet together. https://imgur.com/iKZsXDn https://imgur.com/uFWHUha https://imgur.com/nDCN9qm https://imgur.com/KimkB3z I am currently using the supplied bolts from SC which are level1 standard while I search for level2 bolts with the small divot. I notice while the visor is down I have a small gap remaining have you guys tried solving that with a small piece of velcro or some other method? Please let me know! Next is riveting the backpack and plate and getting all the velcro strapping done for the bracers/knees etc. A few of the pieces nearing completion: https://imgur.com/Fu3cc7J
-
Thanks for the support and kind words. I am going to be checking out a local troop this weekend and hopefully do as you suggested and pick the brains of a pathfinder or two. Trying to make sure I take my time on all these pieces and not freaking out when its not perfect because I can slowly clean up the rough edges be they paint lines or cuts.
-
My build consists of SC trimmed hard pieces and Imperialboots soft pieces. Link to album as I work and add: https://imgur.com/a/tsPVneq I have never done anything like this before so will be going over a lot of my trial and many errors as well as progress. Started with using a Dremel to cut out the scout visor(rough cuts) and then Dremel sanding head followed by hand sanding with increasing grit until it looked smooth and even. https://imgur.com/GcSO2hJ Followed up with marking off via tape and painting the snout to prepare for the greeblie after. Then started on the thermal detonator pack while things were drying. https://imgur.com/DwofkpL https://imgur.com/RCLXOtW Initial progress underway and very open to opinions/tips for building. I have been going off of videos that were linked to me for putting together the pieces and while daunting I have begun!
-

Looking for tutorial videos/assembling tricks
StarHawk replied to StarHawk's topic in Getting Started
I will do so right away! Much appreciated. -
I have just received my ROTJ Scout kit from SC. I have never attempted something of this nature before and am feeling out of my depth but wanted to have a hand in the creation of the full suit instead of just buying a completed set. I have the suggested tools but am not sure how to get started and before I start cutting out the visor I was wondering if there was any SC focused tutorial videos available. I have tried to do my due diligence and have bookmarked quite a few build threads but have not found anything like a helmet assembly video as most seem to be aimed at the armor. Any videos or better resources for someone new to building would be appreciated. Thanks in advance for your time!
