Safetymanual
-
Posts
31 -
Joined
-
Last visited
About Safetymanual
-

Interchangeable chest\back armor straps
Safetymanual replied to Safetymanual's topic in ROTJ Biker Scout Armor/Helmet
Yup, that those covered as well. I just broke down and bought a second belt for this. I'll have another set of pouches too. -
Interchangeable chest\back armor straps
Safetymanual replied to Safetymanual's topic in ROTJ Biker Scout Armor/Helmet
Actually that's very do-able if I use velcro. I'll just need to widen the slits on the armor just a touch. Thanks for the idea! -
Interchangeable chest\back armor straps
Safetymanual posted a topic in ROTJ Biker Scout Armor/Helmet
Anyone try to swap out their side straps? I'm currently running an off-white setup but I want to have an all white setup too, because....why not? I thought I could just add some buttons to the ends of the strapping but I then realized that there's a slit that the strap goes through. I thought I could cut the small piece of armor the strap covers but I really don't want to do that. I could also widen the slit too but I want to bounce ideas off you all first. -
Safetymanual changed their profile photo
-
Fist fighting trees and teddy bears: A Scout Story
Safetymanual replied to Safetymanual's topic in ROTJ Biker Scout WIP
Thanks! Ah ok. That'll be easy enough to fix. I have to get a sewing machine or wait for a build day to sew the straps onto the belt. Build day might be better so I can get more eyes on everything before it gets sewn. -
Fist fighting trees and teddy bears: A Scout Story
Safetymanual replied to Safetymanual's topic in ROTJ Biker Scout WIP
I believe I have my armor all done except for the shoulder bells. I'm waiting on my Flight suit and vest to come in before I know if I need to trim them down or not. I am also waiting on my boots. I learned that riveting is not hard at all. Removing rivets is also easy. Pretty sure my belt is good. I just need to trim some fabric off but I'll wait until I can 100% say it's good. My cummerbund is too tall because I measured wrong. It's currently at the seamstress to have it corrected. -
Fist fighting trees and teddy bears: A Scout Story
Safetymanual replied to Safetymanual's topic in ROTJ Biker Scout WIP
For the chest\back side straps, those can be off-white correct? I believe I'm reading the CRL correctly. Under the belt section: If using off-white cummerbund pouches and side straps, the drop box straps are also off-white. -
Fist fighting trees and teddy bears: A Scout Story
Safetymanual replied to Safetymanual's topic in ROTJ Biker Scout WIP
Thanks for the feedback. Bund height is right at 14" Belt should be no problem to move lower. Edit: Looks like I took my measurements wrong. Bund needs to be right at 9". Shouldn't be a problem for me to reach out to a tailor to get it fixed. -
Fist fighting trees and teddy bears: A Scout Story
Safetymanual replied to Safetymanual's topic in ROTJ Biker Scout WIP
Did a little bit of assembly this evening. First time riveting for me! I suck at wrapping the cummerbund by myself. Feels like I'm pulling my shoulder out of joint doing it. Back of the belt is crooked. My daughter did her best attaching it to me. -
Fist fighting trees and teddy bears: A Scout Story
Safetymanual replied to Safetymanual's topic in ROTJ Biker Scout WIP
I watched the armor video that @BikerScout007 made. Made a huge difference in my confidence to put this together. It was like an armor for dummies video. That being said, I did some strapping while I get a sewing machine. I'm not a big guy and I'm thinking the arm armor might be a bit big. Do I need to trim down everything or should I be able to get by with shrinking the shoulder bell? -
Fist fighting trees and teddy bears: A Scout Story
Safetymanual replied to Safetymanual's topic in ROTJ Biker Scout WIP
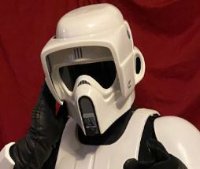
Holy moly! It's been a while since I've updated. I have everything either ordered or on hand now. Only waiting on my flight suit, vest and boots. I still have to assemble the armor. New bucket from @Darth Voorhees from 7CS came in and it's fantastic! He also provided my cummerbund, pouches and cod piece. Shameless plug for this hardworking trooper. Lovely pic of my being all excited. Can't you see it in my face? -
Fist fighting trees and teddy bears: A Scout Story
Safetymanual replied to Safetymanual's topic in ROTJ Biker Scout WIP
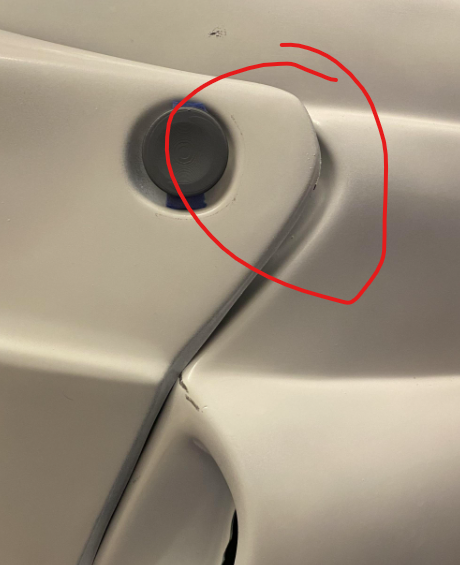
Now that the weather has warmed up and isn't dropping to freezing or below I can work outside. I've finished sanding down by helmet and it's almost ready for painting. I found that I have a few cracks. Can I get recommendations on how to fix these? I am concerned about the jacked up ear hole. I'm thinking that I should just cut the broken and cracked section off. -
Fist fighting trees and teddy bears: A Scout Story
Safetymanual replied to Safetymanual's topic in ROTJ Biker Scout WIP
Helm is coming along. Learning a lot fixing the problems on it. I'm going to start sanding the current paint job off so I can prime and repaint. I've ordered new decals. I believe I've finished painting the greeblies for the varying parts. They need to be flat black correct? -
Fist fighting trees and teddy bears: A Scout Story
Safetymanual replied to Safetymanual's topic in ROTJ Biker Scout WIP
Unfortunately yes, the painters tape just pulled the paint right off. I think I'm at a point that I can start correcting the paint and then mount the visor back on. -
Fist fighting trees and teddy bears: A Scout Story
Safetymanual replied to Safetymanual's topic in ROTJ Biker Scout WIP
I'm made some progress on my attempt to fix the helm. I got some better visor bolts and installed them. How are the ear holes looking? Passable? https://i.imgur.com/kLfq3xM.jpg https://i.imgur.com/CMOMlRR.jpg https://imgur.com/yfQMF7X https://imgur.com/tcU10hY One side of the visor piece isn't quite flush. Is that going to be a problem? https://imgur.com/kYdG9qu https://imgur.com/R3fjoNR I've also started priming the greeblies for my armor. https://imgur.com/orpPxWQ -
Fist fighting trees and teddy bears: A Scout Story
Safetymanual replied to Safetymanual's topic in ROTJ Biker Scout WIP
That's for telling me about the link. It's fixed now. I'm going for basic. Maybe one day I'll go for Lancer. I'm unsure of my weathering at the moment, I just know it's going to get done. The gap I was talking about is the area to the right of where the visor bolt is. The spot where the visor and helmet meet.