ItBelongsInAMuseum
-
Posts
15 -
Joined
-
Last visited
-

Scout Build using Studio Creations
ItBelongsInAMuseum replied to ItBelongsInAMuseum's topic in ROTJ Biker Scout WIP
Thanks Chopper! I'll need to pick up some of that 3M tape to work that curve. And KOtrooper your thread is exactly the one I was looking for earlier! Will post results when its painted -
Scout Build using Studio Creations
ItBelongsInAMuseum replied to ItBelongsInAMuseum's topic in ROTJ Biker Scout WIP
I realize this thread should probably belong in the WIP section which I found after starting it. D'oh! Anyway, Worked on my helmet yesterday with 1fern0 and we made some decent progress. I'm planning to paint the inner part of the snout black, but having trouble finding the guides I have previously seen that touch on proper way to lay tape, and what type of paint to use. I'm going to keep hunting, but if anyone has a quick link handy for snout painting, please let me know! -
Scout Build using Studio Creations
ItBelongsInAMuseum replied to ItBelongsInAMuseum's topic in ROTJ Biker Scout WIP
Awesome info here guys, thank you! -
Scout Build using Studio Creations
ItBelongsInAMuseum replied to ItBelongsInAMuseum's topic in ROTJ Biker Scout WIP
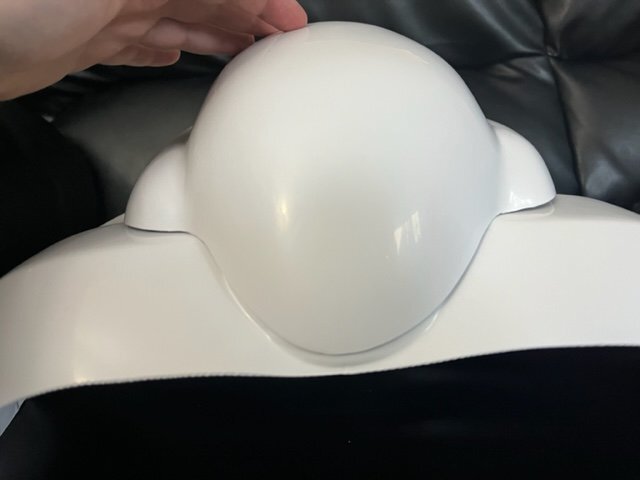
Any tips on getting the tank to lay flush with the backpiece? Should I fill in any gaps with bondo or continue making very small cuts/shaving away areas that are keeping the tank from lining up.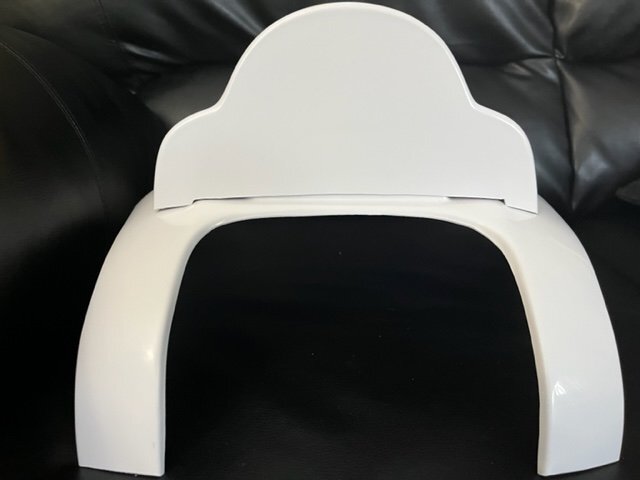

-
Scout Build using Studio Creations
ItBelongsInAMuseum replied to ItBelongsInAMuseum's topic in ROTJ Biker Scout WIP
Awesome, thank you Chopper! -
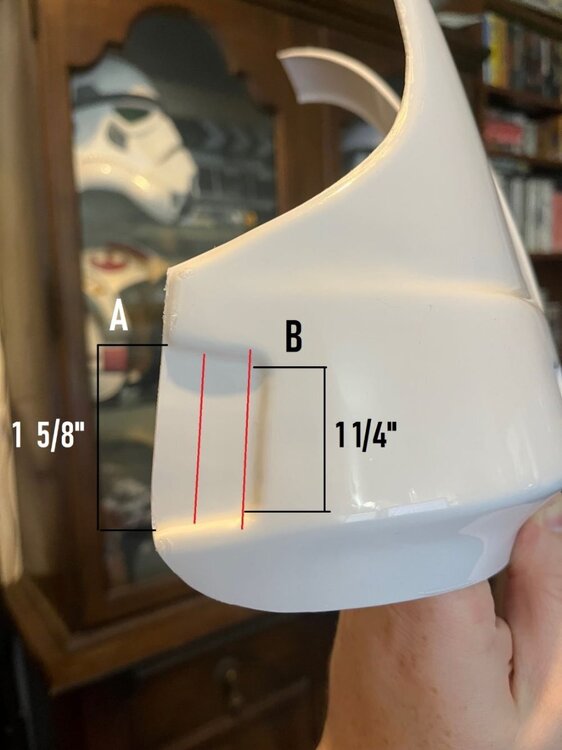
Hey all! Working on my ROTJ Scout Trooper using a Studio Creations pre-cut kit, but full-disclosure: I have so much anxiety about assembly since this was a costly purchase for me and I have limited experience with the tools. Will need a lot of hand holding and I appreciate all the help I can get. I've watched build videos for RS Prop masters and other styles, but I haven't come across any specific to the SC armor set. We'll see how it goes. Today I am working on Chest and back armor, specifically measuring out and cutting slots for the 1.5" elastic in the indentation on the sides of the armor. I've attached a picture to illustrate my questions. From what I have read it sounds like the slot should be cut as close to the small end (Side B I call it), but that end is shorter than 1.5", measuring at 1.25". If I cut there I'll also be cutting into the curvature of the indentation. To avoid cutting into the rounded sides of the indentation, I'd need to cut closer to the center (the red line on the left). Is this acceptable or does the cut NEED to be right up to the smaller end (side B). Last, should my cut be angled to be perpendicular to the indentation or more straight? Thanks in advance!
-
Hey Pathfinders! My kit came with green tinted plastic for the lens, and I wanted to go for the more accurate black. Does anyone have recommendations for the materials they use for the helmet lens? Thanks!
-
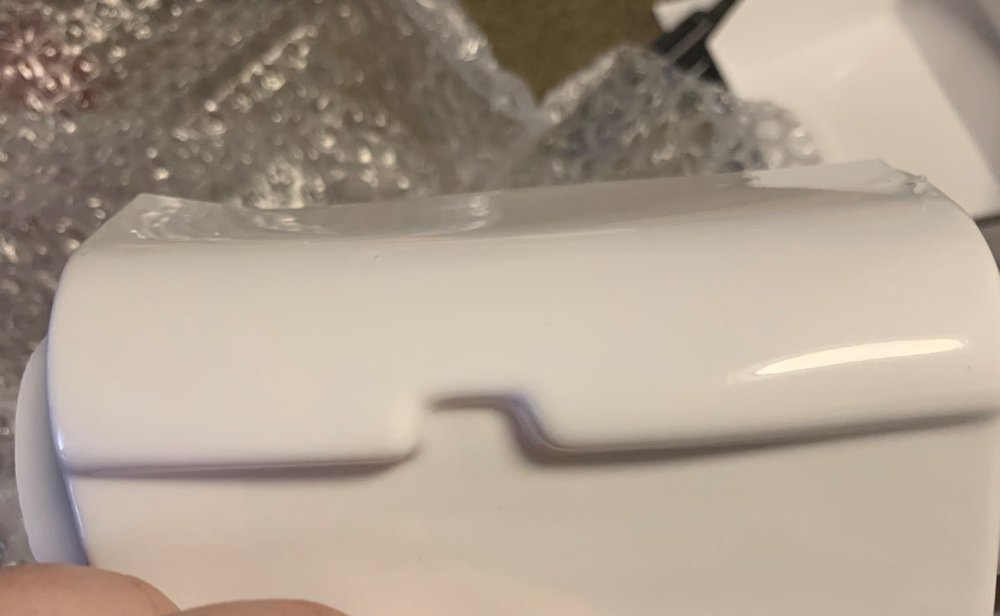
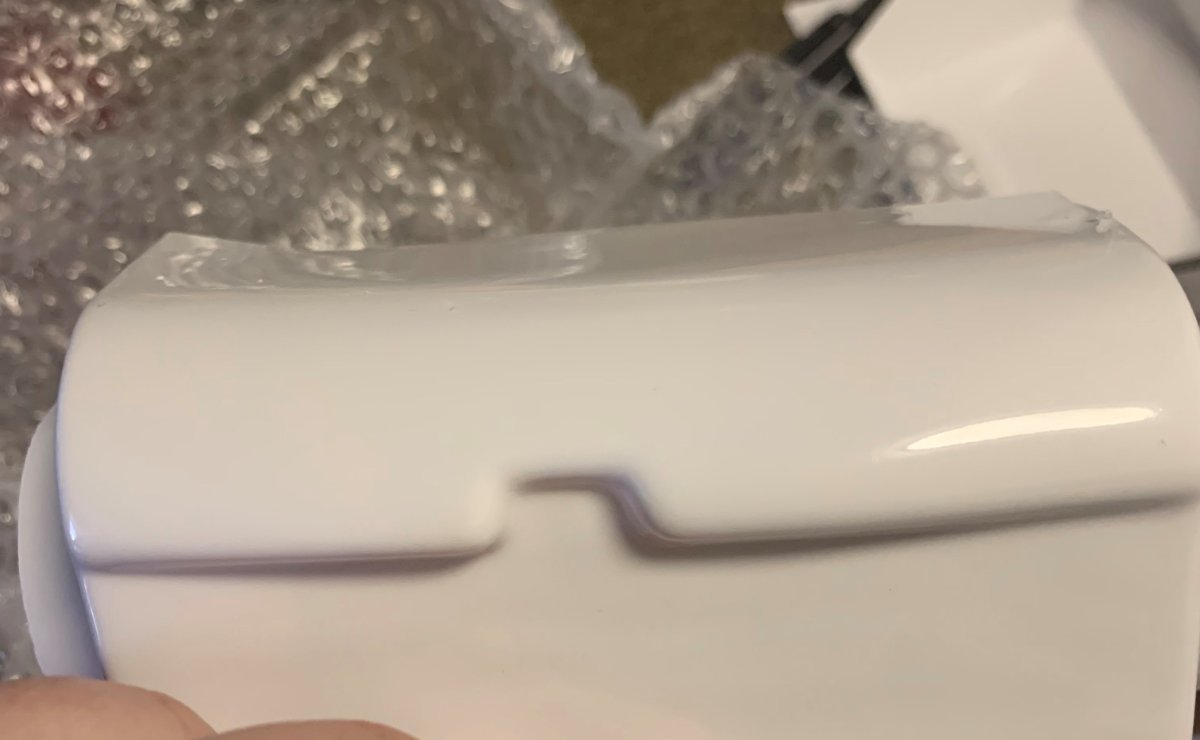
Unwarp SC Thermal Detonator
ItBelongsInAMuseum replied to ItBelongsInAMuseum's topic in ROTJ Biker Scout Armor/Helmet
I hadn't just yet. Wasn't sure if this was an easy fix and wanted to check in first. I'll give Jeff a holler! -
ItBelongsInAMuseum changed their profile photo
-
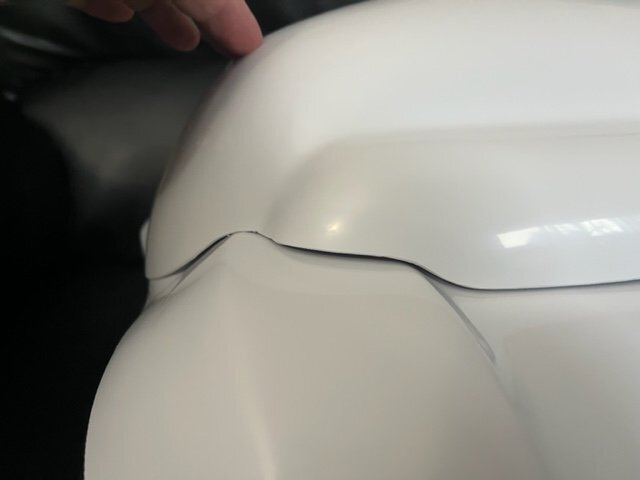
Hey Pathfinders! Just received my SC armor and helmet kit in the mail, and I'm really impressed so far. Unpacked everything, and noticed that the thermal detonator box appeared either warped, bent, or generally misshapen at the top. Is this common for new out of box, and is it an easy fix? Given that the box was kind of roughed up, I'm grateful only one piece was noticeably bent, but not certain what my next steps should be. Would appreciate any advice! Thanks