Temple55
-
Posts
31 -
Joined
-
Last visited
Everything posted by Temple55
-
Thank you! I'll be sure to post for detachment access right away.
-
Good news! I received the approval from my GML yesterday. I am officially a Pathfinder.
-
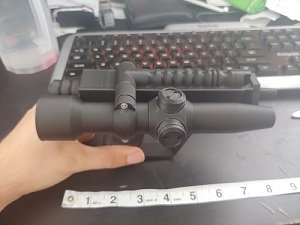
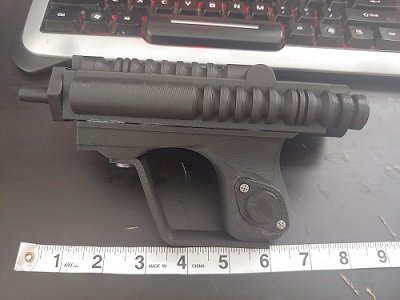
I just purchased this kit and assembled it not too long ago. There's a lot of touch up work that needs to be done, as you can see in the pics below. The size of it seems to be in line with the measurements on the blaster comparison thread, as this kit measures 8 inches long
-
I'll try that.
-
What I'm struggling most with is keeping the clips open enough to slip over my belt. They have a lot more resistance to them than I thought, so it's really hard to slip over the belt, with my hands behind my back. I'm hoping to have the last few adjustments done before this weekend. Here's to hoping!
-
Front and back of the patches, as they are hard to see on the pics I posted above.

-
I still can't attach the TD right on my own, so I had to take the pic separately, just to show it for now.
-

-
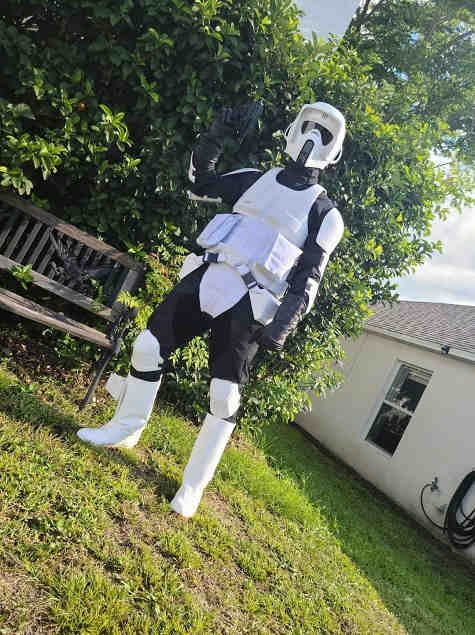
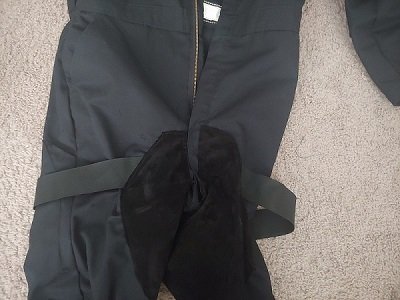
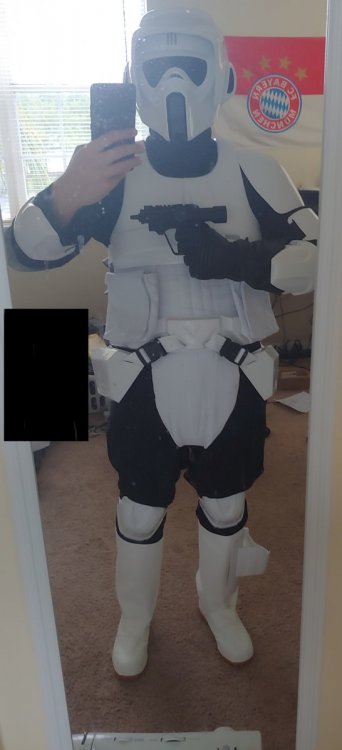
Posting some preliminary pictures, with just about everything done. I at least now know some form fitting adjustments I still need to make. Also, what's a good way to fill out the pouches? I had tried using some empty CD cases, but they were too heavy and kept dragging the 'bund down.


-
Yeah, I hit the zipper once, which didn't break the needle, but caused it to misalign, so that it kept hitting the bobbin case. it took me a good 45 minutes to figure out what was wrong and how to fix it. I tried on the suit today and in the natural light I can see that the riding patches are a bit misaligned. So I will be fixing that while also adding the elastic bands. Once that is done, I just need to fix on some velcro to hold various parts of the armor in place and then clean up the blaster. I hope to get some preliminary pics within the next day or two to post up here, before taking my photos for submission.
-
Several hours and many swear words later, I finished the patches and flap today. Funnily enough, the leg seam was the easiest part. And I forgot the elastic bands like a fool. So, that's a go back for tomorrow. But all in all, I'm glad it's done. Just have a handful of touchups and the blaster to go and I should be ready to submit for approval.
-
Thanks! That gives me some guidance for sure.
-
I'm not very good at sewing in general. Working on this costume had me using a sewing machine for the first time ever. I don't really know how to go about it. Is a straight edge seam enough or should there be more to it? Also, does the whole leg need to be opened or just a portion of it?
-
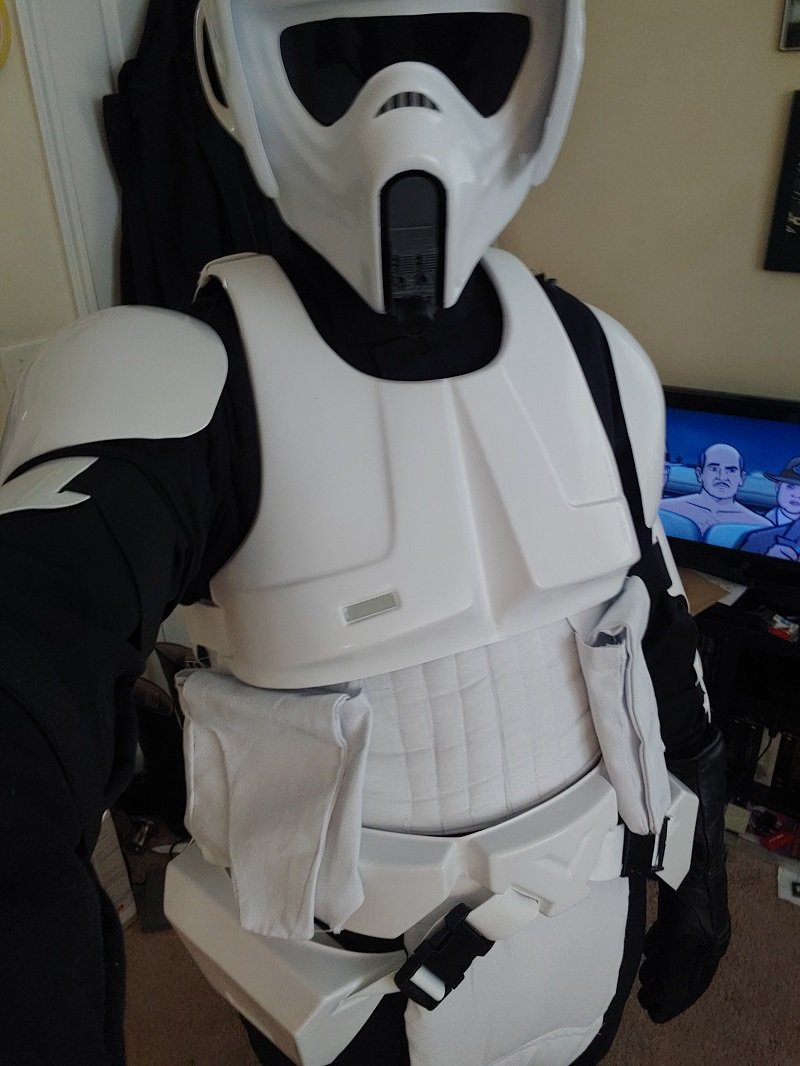
I also have the flak vest and codpiece pretty much done. Just need to make the collar on the vest look neat and proper. p

-
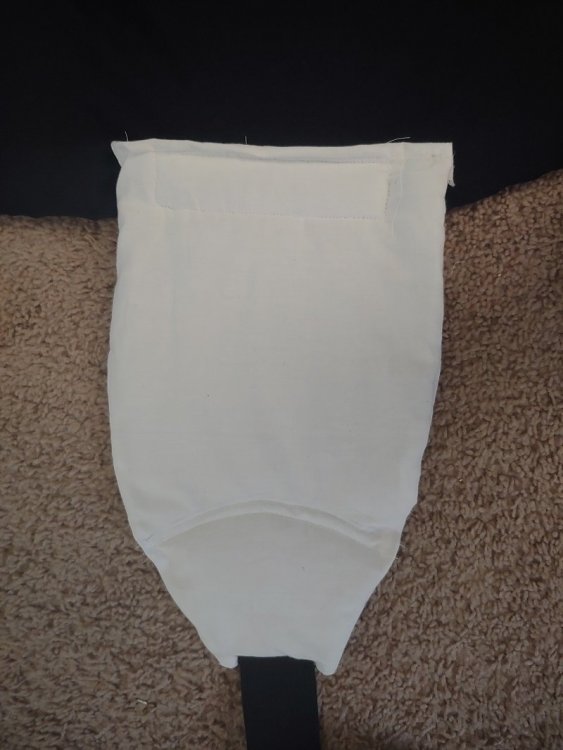
Well, I am just about reaching the end and the part I have dreaded most. The riding patches. Currently have them cut out and will try to tackle the task of sewing them on tomorrow. Still not sure what the best way to go about that is though. I feel like if I seam rip the legs open, I may not be able to get them closed correctly again.

-
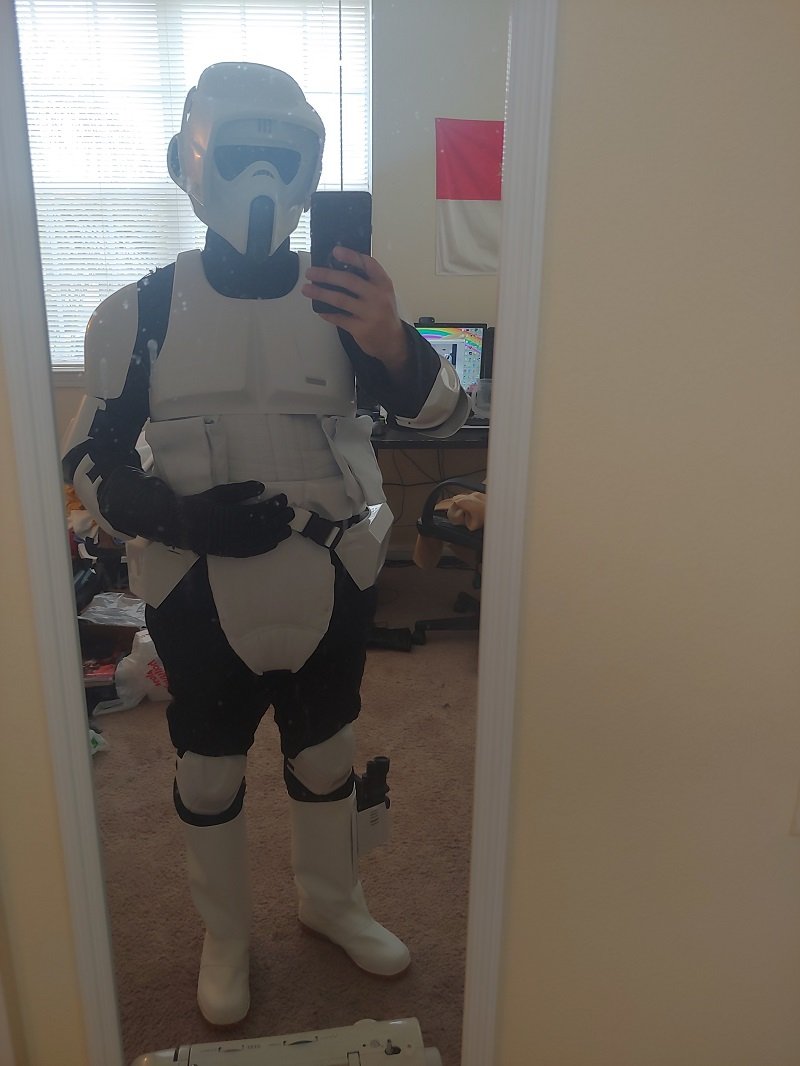
I did my first real test fit today, with all pieces that I have finished, on my progress and thought I'd post up my current WIP. I'm really close to being done. The two big projects i still have left to complete are creating the flak vest and sewing on the leather riding patches and butt flap. Other than that, I think it's just touch ups and quality of life enhancements. Here are some more details about what I still need to tackle: The cummerbund is sagging at the top, due to the pouches, which is causing the pouches to appear lower than they should. Once I have the flak vest done, I aim to fix this with velcro. In that same category, the codpiece is currently not attached to anything. It's only being held up by friction from the 'bund and belt in these pictures, so I think it will have a better fitting appearance once the vest is done and it's attached. The chevron pattern still needs to be sewn on as well and I want to add a fabric stabilizer in the bottom. Add velcro onto the flight suit to help hold the arm and knee guards in place while trooping Add about an inch to the cummerbund's overall length. Putting it on made me realize it's a bit tight. Once my headband comes in the mail, add this inside the helmet for a stable fit Possibly repaint the snout greeblie. It was too light at first and now it appears too dark. The blaster still needs a lot of work being primed and repainted to get rid of the 3d print lines. 1

-
Yeah, the shirt I bought was $4. Messed up the first attempt, so I had to buy a new one. Still, $8 sure beats $97. I think the batting was only $3. Hopefully you'll be able to sell it, or as Chopper mentioned, hem up the sleeves.
-
I'm still trying to find a local store that sells the leather I need. I've seen a lot of people on here recommend Tandy Leather, but their shipping costs are a bit higher than I'd like, to where I live. I found that going that route with the flak vest could save a ton of money too. Cheapest vest I found was $90. A t-shirt and batting hasn't even cost me $10 yet.
-
I'm currently in the process of building a biker scout myself and this is what I've pieced together so far, from various build threads here. The only pieces I still need to purchase is the leather for the riding patches and butt flap. Note, that I am listing the parts that I personally purchased and that there are way more options out there. For my flight suit, I purchased a black, Red Kap Coverall suit, that I have modified. Basic modifications would include removing extra pockets and sewing on the mandarin style collar. Then of course, adding the leather patches and such. The flak vest is the next project I am tackling. following a tutorial I found on this forum, I purchased a black cotton t-shirt and will modify this into a flak vest. The tutorial I am following is a pinned post. If you don't wish to make it yourself, I have seen some quality looking flak vests for sale on Etsy. The gloves I purchased from Wampa Wear.
-
Thank you. That's what I thought after I painted it on.
-
Hello all, Just wanted to get input on the snout greeblie. Is this gray a good color or is it too light? I was told that it should match the decals and this paint turned out a bit lighter than that.
-
mickeymark34's Studio Creations Build Thread
Temple55 replied to mickeymark34's topic in ROTJ Biker Scout WIP
Thanks. I glued it on last night, using the clip, and it hasn't popped of yet, so I think it's all good now. -
mickeymark34's Studio Creations Build Thread
Temple55 replied to mickeymark34's topic in ROTJ Biker Scout WIP
Oh okay. Did not know about that either. Yeah, it didn't come with the instructions. I've been using a KS build tutorial, as it's the closest thing I've been able to find. -
mickeymark34's Studio Creations Build Thread
Temple55 replied to mickeymark34's topic in ROTJ Biker Scout WIP
Yes it is and yes I have that! I didn't know what that was supposed to be used for. That will probably help for sure. Thanks! Thanks. I may just try that method then, if it's been able to hold up there. -
mickeymark34's Studio Creations Build Thread
Temple55 replied to mickeymark34's topic in ROTJ Biker Scout WIP
Well, I tried superglue first, and it just smeared all over the place. Won't be trying that method again. I hesitate with hot glue, because the Florida heat and humidity has not been kind to troopers using super glue in the past. I still have E6000, which I saw being used in a tutorial video. So I may try this. But that takes a long time to cure as well. Thank you for the input.