Rwg86
-
Posts
48 -
Joined
-
Last visited
-
Days Won
1
Everything posted by Rwg86
-
I love the weathering job that you did on the blaster pock-marks on the helmet! Looks really well done. Unfortunately my project is on hiatus for awhile. Thankfully you're giving me great ideas!
-
Looks great so far Luis! I'm glad you posted the previous question since I was wondering the same thing, although I won't be doing the paint job on mine.
-
Oh ok. I wasn't accusing anyone, just merely curious. I figured the different craftsmen might sell or loan out their masters to different places. They're great quality gloves, that's for sure!
-
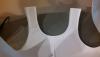
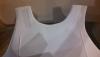
Working on the final touches of the bicep pieces today and put the final layer of epoxy on the tank before sanding and priming. Below is a test fit of the cummerbund and pouches. My wife is hand sewing the velcro from Grumpy's pouches on because she's afraid the sewing machine will get stuck on the think fabric. Halfway there!
-
My problem has been since the armor is tighter on me than Grumpy's cummerbund, it pinches the material and causes the straps to come loose. I'll need to add more stitches or live with it, since the CRL image has some bunching.
-
Wow that cummerbund is big! Is that grumpy's? Undersuit looks good- same color as mine
-
Spent today sanding and priming the bicep pieces, which have been a pain in the butt. I've been layering then sanding epoxy over the residual gaps but i'm still getting some undulations and imperfections in the plastic. The CRL doesn't say anything about them being seamless but I want them to be as smooth as possible before our GML starts to paint it. My dual bucket fans came in today courtesy of EQdizzle from CT.net. I bought the slim version that comes with a 3 hour lithium ion batter and USB charger. They really put out some cool air and I would highly recommend heading on over and seeing what he has to offer!
-
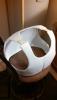
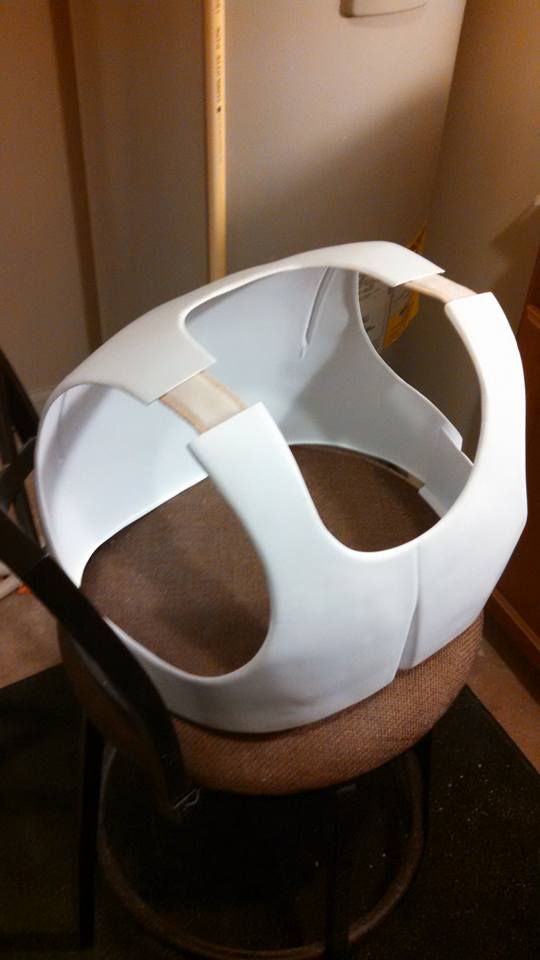
OK Today is priming day! The foot, knee, and forearm armor has been primed as well as the shoulder bells and the chest piece. The bucket had its first coat of primer applied as well. There was some pooling of the paint on the bucket and some residual E6000 so I sanded down the imperfections and will apply another coat tomorrow. I used Model Master's Panzer Gray for the outside and used Tamiya flat black for the inside to "sell" the illusion of it being real armor. I primed the outside first, covered the edges with painter's tape then hit the inside with black. Tamiya paint is really stinky.... I will not be applying a chrome undercoat since my GML does not require it, as the effect can be achieved through weathering. Right now, the seams on the bicep pieces and the shins need to be improved before I do any more priming so I will be hitting them with some more epoxy this week before sanding them down and getting them ready. Same with the tank. 41st Clone Scout approves! And below are Grumpy's pouches and Cummerbund. Is it true that Grumpy sold the "blueprints" for the rubber greeblies used on the Kashyyyk gloves? Guess I'm lucky to have a pair of his gloves.
-
I like Krylon, I've just had great experience with Tamiya when I used to build and paint their Waterline series Imperial Japanese Navy kits.
-
Yup that's Heidi! In regards to your question about bondo- I use the Bondo automotive spot putty to fill in minor dips and holes. No amount of reinforcing will prevent straight bondo from cracking if you use it to fill an open gap. I used JB Weld and Quick-Cure epoxy to fill in the gaps.
-
Looks good so far! I don't think anyone has done a white version. It's fun to order stuff like blasters since it keeps things in perspective. My bucket cooling fans are on their way and I will be ordering a DC-15a long rifle from Heavy on CT.net soon.
-
Below is the current state of the tank and backpiece. The tank was initially attached using Trippler's "backpack strap" method. The gap was filled in with JB Weld and Bondo. In some areas Quick-Cure epoxy was also used. It's about 2/3 of the way sanded before it can be cleaned up and primed. The grey blotch on the back is Tamaya German Grey that I'm going to use for primer. Expensive, but Tamaya paints really are the best. This weekend the first small pieces such as the foot and and forearm pieces are going to be primed Tamaya German Grey on the outside and flat black on the inside. Also, my poor wife is beginning the process of sewing the velcro strips onto the cummerbund for the pouches. Did a test fit and the whole chest piece fits, although I could stand to lose a few more pounds.
-
Nice to see a big tank- I thought mine was a tad too large but it looks pretty close to yours in size.
-
Looks great! You're getting very close!
-
Honestly Bungle's shins fit a lot better i think. Plus I found the BC set to be very tall to the point of getting too close to the knees. These are just right.
-
Ok- below are both of Bungle's shins ready to be primed after a good clean-up and trim. Those gray and light maroon blotches are sanded down JB Weld and bondo. When sanded down with a 220 grit sand "sponge", it achieves a glass-like finish. Now THIS one below is the one I nearly wrecked in the earlier post. After 3-4 layers of JB Weld, lots of bondo and a ton of sanding, it's filled in nice and smooth and will be ready for an initial primer coat once I clean it up and trim some of the excess return on the inside. Proof that you can salvage major disasters.
-
Here's the tank attached with the plastic strips on the inside. I used electrical tape to keep it in place. I used Trippler's suggestion of outlining the opening for the tank greeb using electrical tape to measure the "lip" I'll post more this weekend after the Thanksgiving holiday.
-
Photos soon to come- I decided to scrap BC's shins and use Bungle's instead. They are officially sanded and ready for priming and the tank is cut out and JB Welded to the back piece- did a test fit and it fits well. Below is a picture from a disaster a week or so back- In short I was using the heat gun to help conform the shin pieces together when I tripped over the extension cord and slammed the heat gun tip into the shin seam- it was either that or my hand. The 800 degree tip instantly stuck to the plastic and curled and warped about an inch and a half of the seam into an irreparable mess when I tried to quickly pull it off. Needless to say I had to improvise- after a tirade of profanity. I layered more plastic sign pieces to fill out the damaged gap then filled in three layers of JB Weld epoxy before using bondo spot putty and sand paper to smooth the seam out. It took 4 days alone to repair the damage with all the time JB Weld takes to fully cure. The picture below shows the damage after the 1st layer of JB Weld. Soon I will post a picture of what it looks like now. JB Weld is a great resource to fix any catastrophic damage to your kit before (and even after) you paint it so if you have a panic moment like I did, know that JB Weld can really help you in a quick pinch. Note that this is the industrial JB Weld with 3960 PSI resistance. There is a version for plastic but I didn't want to take any chances.
-
Are the bits from the chest armor areas on the side that you cut too much off of?
-
Hello! I'm in the process of cutting out the tank and preparing to attach it once I cut out a small access panel on the back armor. I was wondering- should the tank rest "flat" against the armor or can it rise up at an angle? I'm seeing conflicting pictures- On the CRL and in Bungle's build it appears straight but on Trippler's build and in the image below it seems to rise up at an angle slightly.
-
This is a learning process.... Apparently the wavy parts on the shin pieces were excess material from the molding that are supposed to be cut. Problem is/was that if I cut that excess material off there is no way I could have slid my foot through and it would not have fit around my legs. It seems I'm going to have to fill in the wavy parts and smooth them out. If that doesn't work I may scrap the BC shins and start over with an old set of Bungle's that I have since they're cut a lot clearer.
-
To echo Trippler's Kashyyyk build..... It's REALLY important to reinforce the bondo from behind if you're going to use it on your shin piece. The bondo will flex and shift with the softer plastic from the sign that's used to join the two pieces together and will eventually crack after you paint it. I'm going to glue a strip of HIPS on the inside of the shin piece to reinforce the bondo so it doesn't shift and crack. Trippler's whole tank cracked along the bondo line where it met the back armor.....
-
It's been a long week. The shin pieces are officially glued, sanded and in the process of being bondo'd together. I must admit, they are a huge pain to work on. Once they're sanded and cleaned up, all the hard pieces will be DONE.....except for the tank....that still has to be sanded, measured and attached to the back. Ferra- Any hints or suggestions you might have would always be welcome since you recently did yours. What's left- tank has to fitted and attached Rubber pieces for the greeblies have to be trimmed and attached attachments made to the belt. Pouches sewed on (my wife offered ) Test fitting prime and painting final bucket assembly.
-
Looking good! Almost there
-
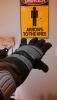
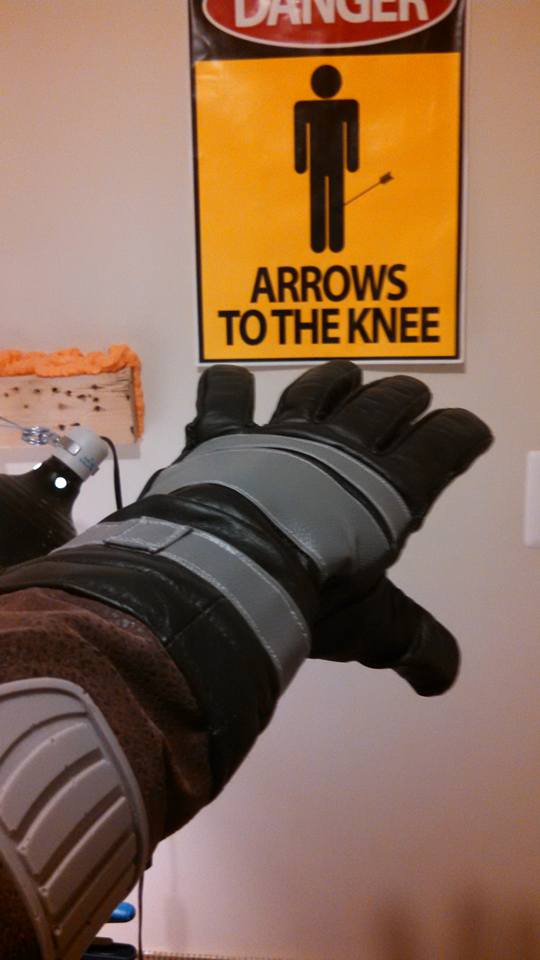
Below are some test straps for the armor using Bungle's first method. I know they're not the right color. I plan on adding a second set of gray straps over top of the armor to be screen accurate and to give some added durability. I might also switch out the tan ones entirely. I'm experimenting on what fits best. Also is a shot of Grumpy's excellent gloves In terms of the hard pieces, all that's left is to assemble and bondo the shins and then the big project of attaching the tank.