

swagger
-
Posts
103 -
Joined
-
Last visited
Everything posted by swagger
-
So after going through many pairs of boots that have been damaged due to the ABS holster pressing into the vinyl while in storage, I decided that I wanted to try to build a pair of boots with a removable holster. I used snaps that are hidden under the holster and the rivets are trimmed down to nubs in the back. See the pix below or this video and let me know what you all think of this solution.
-
Do you have a link for the STL files for the tank topper?
-
Sniper plate goes on the left shin. Spacing on the boxes seems a bit off but it's hard to tell from the angle of the pix. Looks very nice though. Great job on the weathering.
-
ST-26868 is now approved.
-
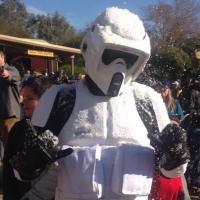
Debuted my squad leader at Phoenix Comicon last weekend. This is an Inception Studios kit from a limited run on RPF. Weathering details used a dark umber oil based paint mixed with mineral spirits, which I then slathered on and rubbed off to achieve that "toasted" effect. And just for giggles...
-
Just a scrub brush that I should have asked permission from my wife to use first before I f&$ked it all up with grease and wood putty.
-
It could work but I personally didn't want to leave the leather nice and supple. I wanted it to look like it's been through a lot of grime, dirt, and hell.
-
Check out my post under the Boots section. http://forum.bikerscout.net/index.php?showtopic=17168
-
I use a DLT-19 but I added a scope, a rifle sling, and removed the bipod. Kids love holding that rifle and looking through the scope. Most people think a rifle sling is used for carrying a rifle on your shoulder or across the body. That's one use but the primary purpose of a rifle sling is to help stabilize the rifle. I used a WWII Enfield sling for my rifle.
-

Walt's Trooper Factory Armor vs SC Armor
swagger replied to patsfire32's topic in ROTJ Biker Scout Armor/Helmet
One significant thing I really like about Walt's kit is that the whole belt is one piece. -
Took my brand new Orcas and put them through hell. I started by scrubbing them with steel wool to dull up the patina. Once they were sufficiently roughed up, I coated them with wood putty. I let them sit for 8 hours and then I scrub off the excess, ensuring that each crack, crevice, and seam retains a good amount of dry wood putty. I then coat the boots with black grease. Make sure it has a high viscosity so it goes on thick. Let it dry for about an hour then scrub the boots down. Repeat as many times as you want until you get the desired look. For the soles i mixed some beige oil-based paint with mineral spirits, about 60/40 and brushed on the slurry in the areas I wanted to touch up.
-
Thanks!
-
Could you show a pic of the inside?
-
How is it being used exactly? Glued onto the armor or as a separate vest?
-
I'm in
