XenoPsycke
-
Posts
17 -
Joined
-
Last visited
Everything posted by XenoPsycke
-
I have purchase just the greeblies from SC. Just email the contact address on the site. Find yourself a military friend and get them shipped at a in states rate! I speak from experience, it does take a while though The total weight shouldn't be that much of an issue if you get it sent straight to you. Email them, and I am sure they can get you a ballpark figure, if not a full quote.
-
Received my replacement parts from SC!!! Soon, soon my precious will be complete . The box straps have been raised. Ordered a new set of boots from IB (can't wait!). I also did my first light weathering on the armor bits as well ;D
-
I used a strong strength modeling grade super glue. I then scored both sides to have a more secure bond. so far everything else is braking before the bond is. I glue that sucker on GOOD!
-
Well I received my approval notification from the 501st! I am also still working the issues mentioned. Modded a smaller pair of suspenders, should be hidden much better now and help with with cummerbund. Studio Creations finally responded, and should be getting the replacement parts (how dare they be busy during Halloween ). Tonight I will be adjusting my side box issues. Hopefully soon I will be looking spiffy! Also even though they don't list them on the site IB, seems to still make TB boots on special request. Hopefully there isn't a mis-communication, and get a total different type o.O
-
Thanks for the info. I have new suspenders to modify for being hidden and will hopefully better hold up the cummerbund. The greebly bit was frustrating. I glue it on REAL good, so I contacted SC to see about purchasing a replacement. I was following "The Costumes of the Original Trilogy" ref pictures. It is shown with round bit on the left with the square on the right (and isn't a flipped image). It does look there are shots of it in the movie that way with the square upside-down (look at the trooper Han taps on the shoulder then run the corner, he does seem to have extra greeblies near the round bit though), but I understand the 501st is more for being uniform. A standard was set, and that is what is being stuck with. It is just doubly frustrating that I know from actual military experience that nothing looks the same . So many "when this is a 46442-702-01, but the 46442-702-02A are made this way and are only compatible with the PM337-3, not the PM337-4". As for the chin issue, should a pic be taken with the front opened to see me wearing the baklava, and me having the white chin plate?
-
Here is hoping it all goes well. I can't wait to start weathering it, but I keep hearing that I shouldn't weather it till after my approval.


-
Had to remove the pictures to add the ones submitted in another post. Here is hoping it gets approved.
-
I wish I took more pictures of me doing the Velcro attachment to all the armor bits. For some reason I thought it would be harder than it actually was. The straping on the shoulders took the longest. E6000 was my friend , although seeing other do a more temp attachment seems like it would be better for storing. Oh well, lessons learned for when ever I upgrade for a lancer status. I was trying, but after doing it, I am realizing all my mistakes. Future me will figure this out one day
-
Stickers peel, I know it is a personal preference. If I am going to do this, I was going to do it "right". At least my version of right, which means everything is painted. The side decal was easy, just peeled out the sticker bits, and then used the wholes as the paint guide.
-
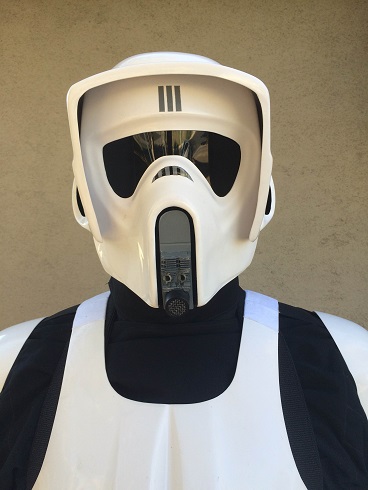
They are Wampa Wear. Here are a few of my in work picture of my helmet. The lines in the grey boxes on the back where a pain. First attempt was solid grey background then used tape to have the back lines be sprayed on. That didn't work, it just bleed everywhere because it was so small. Next tried spraying black then leaving tape lines for me to spray grey on top, peal tape and black lines are left. That didn't work either . I then redid the grey box then just used a marker for the lines. They then could wipe off . Finally redid the marker lines, then put a clear coat over it. I don't care any more, they are on the damn thing now. The side holes where cut out, just used the stickers as a guide for cutting it out. Sprayed the inside "bump" black. Pro tip, painter's tape and old newspaper adds are a modeler's best friend. The speaker mike in the front had the "screen" dry brushed with silver, then redone with black for clean up.
-
They be Wampa Wear.
-
After sanding down all the hard edges, and a boring 8 hour secretary duty (I am in the military) I started working on the helmet. Note to self (but I never seem to follow) cut away. I swear I have some much blood spilt for my hobbies because I am an idiot and use my duller blades.
-
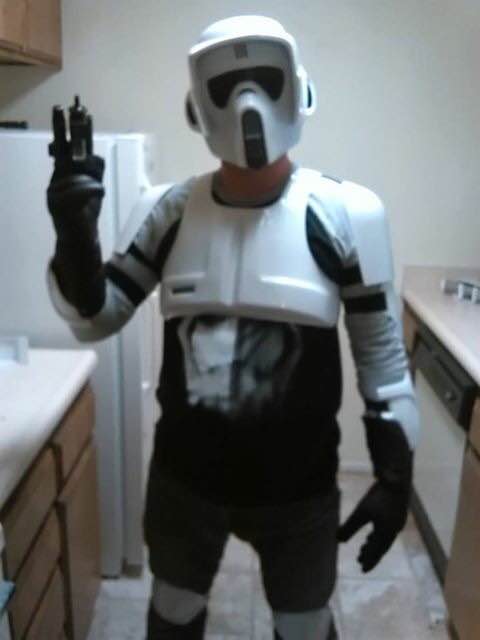
First I received my gloves. Oh boy do they fit nice! I was simple thing but started me down the dark path > The box-o-armor come after.
-
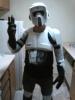
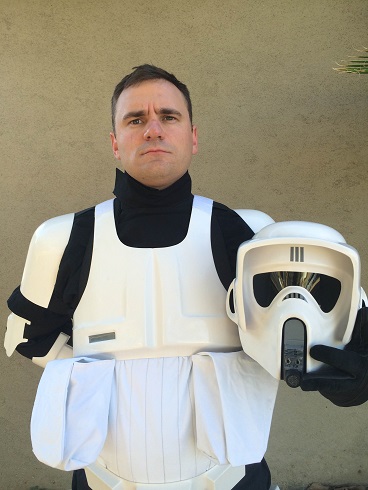
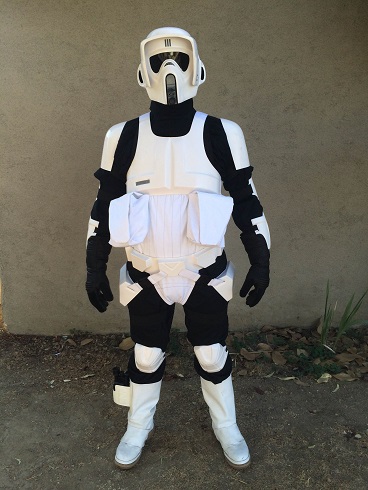
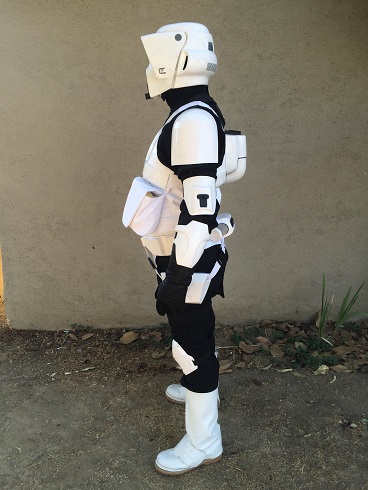
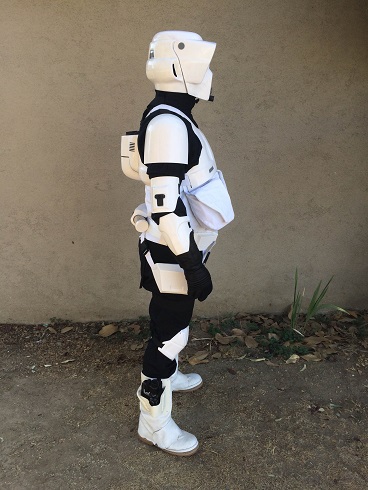
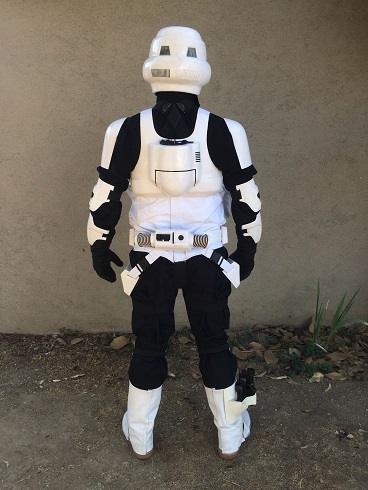
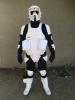
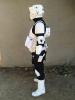
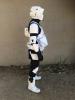
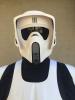
Howdy! I have been working on my armor bits for a while, but figure I do a post on it. The armor bits are from SC including the helmet. Got me some Wampa gloves, and the soft bits are a commission from fellow forum member. In my "Hey world" post I have stated I have a modeling (as in Gundam, and Warhammer) background with my hobby expertise. The pic in this post is of me wearing what I have completed.