

Darthzemog
-
Posts
107 -
Joined
-
Last visited
Everything posted by Darthzemog
-
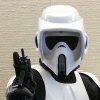
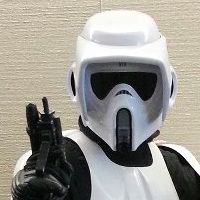
The MANDALORIAN Biker Scouts
Darthzemog replied to Rosso's topic in Scout Trooper: "The Mandalorian" HQ
I'm kind of enjoying being the most hated character in SW now because of those Scouts punching "the Child" aka "Baby Yoda"! -
Any pics of a pre assembled KS helmet?
Darthzemog replied to Bobik96's topic in ROTJ Biker Scout Armor/Helmet
You can see some pics of my KS helmet kit in my build thread here: http://forum.bikerscout.net/index.php?showtopic=9671 I was a little intimidated at first, but I used the following guide and it wasn't so scary after that. http://forum.bikerscout.net/index.php?showtopic=77&st=0 I did end up replacing the lens material and decals that they sent with stuff from Trooperbay on eBay. The lens material KS included was too thick for me to use and the decals were a joke. I also didn't use the furnature pads they sent for the bolt covers, instead just painted the elevator bolts I picked up at Lowes since the kit didn't come with any. I also didn't use the screens on the ear vents, since it wasn't screen accurate. I know I'll eventually have to replace the nose bit for one that is more screen accurate, but for now its fine. My kit was a good pull, a couple of flaws here and there, but most were trimmed away or don't affect the overall look of the helmet. I've read horror stories though about bad pulls from KS. My buddy has a Mon Cal helmet and its very nice. I'm considering ordering one of his kits though his wait times are insane. Another alternative is a SC (Studio Creations) helmet kit. It looks similar to the KS kit, but might be a little smaller, so if your head is big it might not work for you. I'd suggest contacting Jeff at SC to ask for details about it. My armor came from SC and I can't say enough good things about Jeff and SC! Good luck! -
Terry, thanks for the imput, your build thread is awesome and I used your method for "bridging the gap" of the chest and back armor, sewed the white cloth to some black elastic to slip on over the gap, worked great! Jeff, WOW, that would be great, will send you a pm right away! I really like the look of your new helmet kit too. I may hit you up for one when I decide to do another helmet!
-
Thanks man, I'm so close I can taste it! Will be test driving it on the 22nd for a charity walk, pretty excited to get out there in it.
-
Looks good, would move the bicep armor up a little closer to the should bells, they seemed a bit low to me. For the knees, I test fitted them on the flight suit, with the straps on them. Then had Velcro sewn to the flight suit where the top part of the knee armor would be and placed Velcro in the underside of the top of the knee armor. The result, they don't slip down anymore as they Velcro right to the suit once I slip them on with the straps attached. I can walk, run, kneel down and squat all fine without them looking funny or moving. Just something I picked up here on the boards that worked good for me.
-
The knee pads look great, though I wonder what the sweat factor is with them? It seems like I sweat way more in the Scout then my TK. Just something to think about when adding in padding to different areas. As for the heavy duty Velcro, Walmart, Home Depot, Lowes, any fabric store should have it. While my SC kit came with all the Velcro I need for the armor, I had picked up some more for "just in case" situations at Walmart. A little piece of mind I have is that once the Velcro was sewn to the elastic straps, it acts like an anchor when its threaded through the "vents" that SC cut on the pieces. So even if the Velcro fails, the straps will stay in place.
-
Armor Decals, paint or what?
Darthzemog replied to shdwtrpr13's topic in ROTJ Biker Scout Armor/Helmet
I went with Trooper-bay for the tank and helmet decals, can't go wrong with him, his decals are excellent and super easy to put on! I also purchased lens material from him which he cut to the specific size I needed. Easy to trim with ordinary scissors and works great! I can see out just fine and no one can see in. The decals and lens material that KS included in their helmet kit just stunk IMHO. Paintwise, I used Testors model paint. Red=1150, White=1168 and Grey=1138. For painting the inside of the helmet and nose, I just used flat black spray paint. I then hand painted the grey in the nose, on the nose piece, the helmets elevator bolts and the little rectangle on the chest armor. Just make sure you mask off real good where you are painting with blue painters tape. Also hand painted the red stripe and white circle after the tank was applied to the back armor and the tank topper was glued down. I need to touch up the red a little, but overall it all worked out nicely! -
Okay, so I got a lot done! I got the helmet completed, Trooper_bay decals and lens material! He cut it to the size I needed and it was so incredibly easy to cut and insert into the faceplate. The lens material KS provided was way too think for me to use. Anyway, here are the latest pics. Still need to do the suede, butt flap and flak vest. Will be looking to have those done by Dec and weather it of course! TB9664 is almost there. Front: Right side: Left side: Back: Freeze Rebel Scum!
-
Getting closer, painting some of the helmet tomorrow, inside black, the nose, nose bit and the elevator bolts. Decals and new lens material ordered as well from Trooperbay. Couple of updated pics, with the helmet so far. Back: Front: I could have sworn there was a good armor weathering tutorial here, but I can't seem to locate it. Can someone point me in the right direction? Thanks, Mike
-
Looking good man!
-
It came with 4, used them for the thigh boxes. For the back I had Velcro sewn to the large 2" (I think it's 2") strap. Works great and the thermal det hooks to it perfectly. Will get some pics of my belt to you, but you can see a pretty good shot of it in my first pics in the thread.
-
You can check my SC build thread for pics on how I secured the tank to the back armor. You should invest in a rivet gun too , I'm surprised at how handy that thing is even when not building armor! Mike
-
What type of paint to use?
Darthzemog replied to Darthzemog's topic in ROTJ Biker Scout Armor/Helmet
Thanks for the responses guys, I have a better direction to go now for the paints! Mike -
Hey All, I looked through several topics on the tank topper and could not find any answers about the type of paint to use to finish the tank topper, meaning the white circle and red stripe. What type of paint have you all used before? Model paint? If so, what brand and color/shade specifically other then just white and red? Gloss white, white? Red, cherry red, fire engine red? Or did you use decals? If so, where did you get them? Also, do you paint the rivets used in the creation of the belt and on the boot holster? If so, what paint do you use for that? Is it the same white for the tank topper? Finally, I know this relates to the helmet, but figure its more of a paint question, so what type of black paint do you use for the snout and the snout piece? Spray paint for both? Model paint for both? What color/shades specially other then just black and grey? Can the grey be used for the chest armor section too? Or should you use a decal? If a decal, where did you get it? Thanks, and I hope this can help out some other noobs that still need to paint up these areas on their Scouts. ~Mike
-
Whoo hoo, got my belt finished, so now it's just a few little details here and there, but the hard part with the armor is done! On to the helmet! Front shot: Right side: Back: Left side: Pathfinders, here I come! ~Mike
-
Thanks Chex for taking a look at my build. How come I would have to remove the trigger? Anyway, I found some extra styrene that I had from another project that I was able to cut and then shape ala heating it over the stove and then bending it. I used some E-6000 to glue it to the inside of the tank and once dry was able to bolt it to the back plate. When I put in the bottom rivet, it really balanced it out! A little scarey, but exciting too since this was the last big bit of the armor build that I had left! A few minor details here and there and I will be ready to move to the helmet! Here are some pics: Holes drilled into the back armor: My styrene "L" bracket: Another shot of it: The first transport is away,....er, the tank is attached!!! What great feeling since I was so worried about this piece! Shot of the wing nuts that help hold the tank to the back armor. Once the bottom rivet was placed, it all balanced nicely. Shot of the upper armor, now with the tank attached: Another shot of the upper armor with the tank, you can also see the wing nuts. Will have to pad over them. Will get a final build pic when I get all the little details done. Wow, definitely a fun build. A little scarey here and there, but if you are patient, don't rush and do a little at a time, it all comes together nicely. ~Mike
-
Hey All, I have slowly been putting together my SC kit and so far its been really fun and not as daunting a task as I first thought when I first got my box of pieces! I have learned a lot from viewing the different threads here and have used that information and Jeff's instructions to get my armor close to complete. I have however hit a wall with attaching the tank to the back armor. I have seen a couple of folks that cut into their back armor and created a lip to rivet the top of the tank to. I would like to avoid that as I'm not too keen on cutting into my back plate. I also saw one thread where the person used some type of plastic "L" form to glue the tank to and then bolt to their back armor. I like the look of that but I have not had any luck in finding a suitable piece of "L" bracketlike plastic that I can use. I thought about making something with traditional "L" brackets, but it did not come together as I had hoped and have scraped that piece. So I am asking for some help from my fellow Scouts that also have SC kits. How did you all attach your tanks to your back armor? Pics would be great too if you can provide them! Also, figure I should show a couple of pics from my build. I know that I'm far from any type of Lancer status, but thats something I can always work on afterwards. I just want to get my Scout built and 501st approved. The box arrives! Unpacked the pieces, a little overwhelmed at this point... Kropserkel Helmet kit arrives! After trimming, a little mock up... T-bits and Thermal Det put together,...greebles ordered.... Mock up so far... Todays work, boot and holster, check! My Scout pistol. Fitting the pistol into the holster. My belt, almost completed. Thanks for any and all help with my tank issues and any advice in general on my build. Once I get the armor completed, then its the helmet, and I will likely be back asking for pointers on that since I know I will need it! Overall though, I'm really having fun putting this together and I am looking forward to trooping as a Scout, partly because I will be able to sit and crouch unlike in my TK! Oh and don't worry, once its all together, I'm gonna dirty it up! ;-) Thanks again, Mike (DZ)
-
Overwhelmed! Correct Technique? Where do I begin?
Darthzemog replied to a topic in ROTJ Biker Scout Armor/Helmet
Ryan, you sound like me a few weeks ago, a lot over wheimed after looking at all that you need to do. However, once you start it, it goes quickly and as long as you tackle each piece one at a time, you will be surprised at how easy it goes together. I'm about 90% done with my SC armor. The one hurdle I am having difficulty with is how to attach the tank. I know that after reading through some threads, the way in the instructions is incorrect since you can only use 2 rivets. So I'm likely gonna need to ask for help/ideas from the kind folks here on how they all attached their tanks. Other then that, I have found this build to be fun and not as difficult as I once thought it would be. Just take your time, ask questions here or review threads to see what others have done and most important, have fun. Laters, DZ