M.J
-
Posts
1,247 -
Joined
-
Last visited
-
Days Won
29
2 Followers

.thumb.png.0203e6f759a851191b32d71c1bccd0bb.png)
About M.J

- Birthday 05/16/1964
Recent Profile Visitors
1,155 profile views


-
pigskin is a little thinner and work well on the pants. Not everything is on the site. The are smaller but just one large hide will do the trick, I have 10 pigskins different colours and anyone of them would do the trick. If you find the cow hide a good price go for it
-
I'm not quite sure, I tend to look for colour and length and which one I need, like I said give them a call.
-
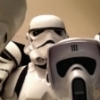
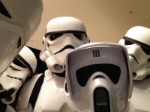
Awesome Lachy, Chat to the people over phone from Lefflers they will be a great help. Talking about skin I'm just been working on updating another 501st costume, as the leather had faded and I'm giving the costume new life so to speak. This is the how they measure the skins. Just as chopper mentioned ask about the thickness as well.

-
Here in Melbourne is https://www.leffler.com.au/shop/leather/suede/ If you can find a supplier close to you I would highly recommend to eyeball the skins. If you have fabric on the pants, the bum flap should be consistent. Watch the thickness you machine wont sew the layers if the leather is too thick Though it is easy to sew the pigskin onto the pants as you don't need to fold over so there is no fraying
-
Sorry may I ask what you used for pants? is it suede or Pigskin
-
Hi ya Lachy, Spotlight will have the faux suede. I would suggest to sew 2 layers together turn inside out and there will be no seam, the only seam seen is where you attach to the pants. Watch the position of the flap as well. You can look into pig skin aka Suede, that is sold here in Melbourne depending on the size of the hide it could be around $30 then postage, last time I went the prices had gone up, you'll need a leather needle.
-
HI ya Matt, I found its my posture, the way I hold my shoulders and Helmet. It might surprise you but those little things can stuff your back, hip and neck... been there. Shoes and inserts, I did this with another costume my hips where on fire and worked it was my shoes. Try standing differently, when you have something unnatural on your body will tilt and act differently hence the muscles are in different positions. I hope this helps
-
Good Luck Brandon
-
Looking good!!
-
Erik, also with the faux leather, (I have the same on mine), once cut it will have to be folded, so when you are doing your patches for your pants they just cant be sewn on, you'll have to fold then sew, ironing then pinning helps. You can pre sew as long as you sew on the same line so there is no double stitches. When its either Leather or pig skin (my favourite) no need to hem just cut into shape and sew on. You can sew Pig Skin and suede with a leather needle, pig skin is more forgiving if you didnt buy one. I've had my faux leather for over 10 years and still going strong, its just tricky to sew on.
-
Hello Erik, Welcome to Pathfinders, if you get stuck building your soft parts please show us, we will be able to assist to the best of our ability.
-
Hi ya Paul, Being the young lady, she can also have a two piece undersuit.
-
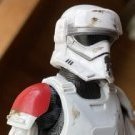
Hi ya Kirsten, Oh this brings me back, it can be quite a mine field fitting armor to a smaller frame. I agree with Retrofire, before cutting and moulding start on the vest and Cummerbund, these will change the fitting of the armour. Your front chest piece looks good the back piece is a smidge low, the back neck line is a little low than one would want and you can see there are not yet matching. Though before adjustments, get those soft parts up and running. I concur with the bell, it is a tad large and the arm piece, I like how you've marked it out, go by the old saying "less is more" don't be afraid to mould it in, if you haven't done it before I would suggest hot water, mould the arm parts to your body only so slightly.
-
Good to hear. There are a couple of different ways, I have a strapping system. Others do the vest/ overalls / chest Armor with Velcro. The strapping is over the shoulders, this gives the bun movement with you and is also adjustable, using less Velcro.
-
Glad Chris is helping with the strapping. You’ll need to bring the bun up, is it attached anywhere? Basically to keep it up. Otherwise it will drop drown when least expect it.